
Kontakt Tutorials
Creating Your First Instrument Performance View
With Kontakt Scripting, Instruments can have custom control panels called Performance Views. This allows you to control Instrument settings without switching into edit mode and allows you to create a custom user interface. In this quick tutorial we will go over creating your first instrument performance view, add a background for it and add a few controls.
The Performance View is a customizable “easy-edit” page for each instrument. With this view you can design the look and control elements of your Instrument. Up to 5 tabs are possible and each tab can have its own layout. Let’s take a look at making our own performance view.
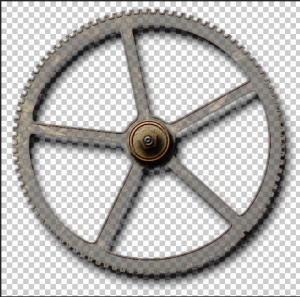
First make an Image for the Instrument Icon. It should be 33 x 34 pixels and saved as a png with an alpha channel.
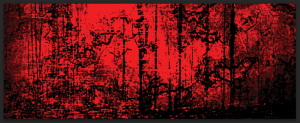
Next make a background image for the Instrument Wallpaper. It should be 633 x 250 and have a color depth of 16, 24, or 32 bits.
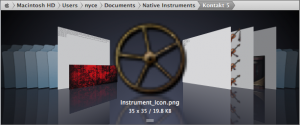
Save both images in the user pictures folder. On mac its /Users/<username>/Documents/Native Instruments/Kontakt 5/pictures. On pc its C:Documents and Settings<username>My DocumentsNative InstrumentsKontakt 5pictures.
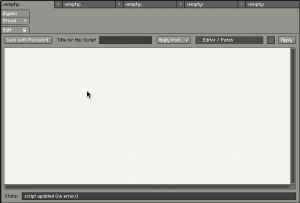
Open the script editor and click edit.
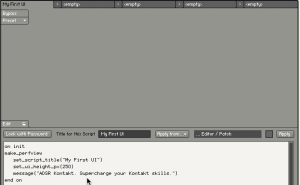
In the editor window enter the following block of code, then click apply.
on init
make_perfview
set_script_title(“My First UI”)
set_ui_height_px(250)
message(“ADSR Kontakt. Supercharge your Kontakt skills.”)
end on
The first line marks the beginning of the script initializing. The second line enables Performance View, the third sets the title of the script, the fourth sets the height. Here we have chosen to set the height of the performance view in pixels. To set the size in a grid, use set_ui_height_px(4). The fifth line sets a message when the script is loaded in the lower, left of Kontakt. This is a great way to debug and provide information. The last line end on, marks the end of the script initializing.
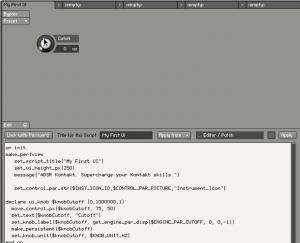
Next we’ll set the Instrument Icon by entering the following block of code before ‘end on’, then click apply.
set_control_par_str($INST_ICON_ID,$CONTROL_PAR_PICTURE,”Instrument_Icon”)
This line sets the Instrument Icon where Instrument_Icon is the name of the Instrument Icon without the path and without the file extension.
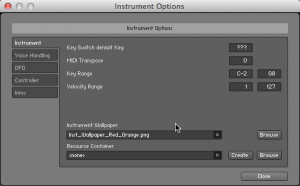
Next, set the Instrument Wallpaper by clicking on Instrument Options and setting the Instrument Icon by browsing the picture folder and choosing the Instrument Wallpaper created earlier. In order to see your changes exit Instrument Edit mode.
Go back to the script editor and add a knob, by entering the following block of code before end on, then click apply.
declare ui_knob $knobCutoff (0,1000000,1)
move_control_px($knobCutoff, 75, 50)
set_text($knobCutoff, “Cutoff”)
set_knob_label($knobCutoff, get_engine_par_disp($ENGINE_PAR_CUTOFF, 0, 0,-1))
make_persistent($knobCutoff)
set_knob_unit($knobCutoff, $KNOB_UNIT_HZ)
Here’s a description of what each line does:
-declares a knob a sets a min value of 0, a max value of 1000000 and a resolution of 1
-moves the control to the x,y position of 75, 50 in pixels
-set the text of the knob to ‘Cutoff’
-set the label of the knob by getting the value from Kontakt’s Cutoff parameter
-allows the value of the knob to be saved when the Instrument is saved. When the Instrument is reloaded, the knob will be set to the last value
-sets the units of the knob to hertz
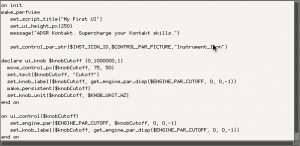
We’re almost done with our Knob but we need a few more lines that actually tell Kontakt to do something when the knob is moved. Enter the following block of code after end on, then click apply.
on ui_control($knobCutoff)
set_engine_par($ENGINE_PAR_CUTOFF, $knobCutoff, 0, 0,-1)
set_knob_label($knobCutoff, get_engine_par_disp($ENGINE_PAR_CUTOFF, 0, 0,-1))
end on
The first line marks the start of the knob being ‘controlled’. The next tells Kontakt to update the Cutoff parameter with the value of the knob, and then the label of the knob is updated with the value from Kontakt. And the last line marks the end of Kontakt being controlled. This block code basically keeps the knob and the underlying parameter Cutoff, in sync.
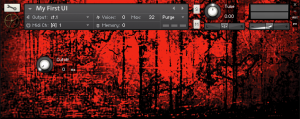
And here is the finished product. An instrument with a custom Instrument Instrument Icon, Instrument Wallpaper (that also serves as a performance view background) and a custom knob that controls Filter Cutoff.
Kontakt Scripting is powerful. That’s an understatement. We’ve only looked at the tip of the iceberg with the performance view and in weeks to come, we’ll build upon scripting knowledge that we learn today. Feel free to browse the KSP Reference Manual to get a deeper understanding of the commands we used today.
Until next time…now go make some music.
Have A Question Or Comment About This Tutorial?
Want to ask a question about this tutorial or perhaps you have something to add?
Click through to our forum post about this tutorial and join the conversation!
 YOUTUBE