
FM8 Tutorials
Making an FM8 Pipe Organ
When it comes to designing instruments like an organ, there are a lot of things to take into consideration. Luckily FM synthesis is the perfect way to truly capture the energy and character of these kinds of instruments. Today we will be looking at how to design an FM8 pipe organ that is flexible enough to be used in more than one type of music. Most people think of large churches or cathedrals when they think of pipe organs. But what about one that is able to move between classical, spiritual and modern by simply adjusting the amount of reverb needed? It is possible and this lesson in sound design will show you how to do it. And once you are done following along, you can begin to experiment with using some additional effects and processing techniques in your DAW of choice to dial it all in for your projects. Let’s see how it’s done.
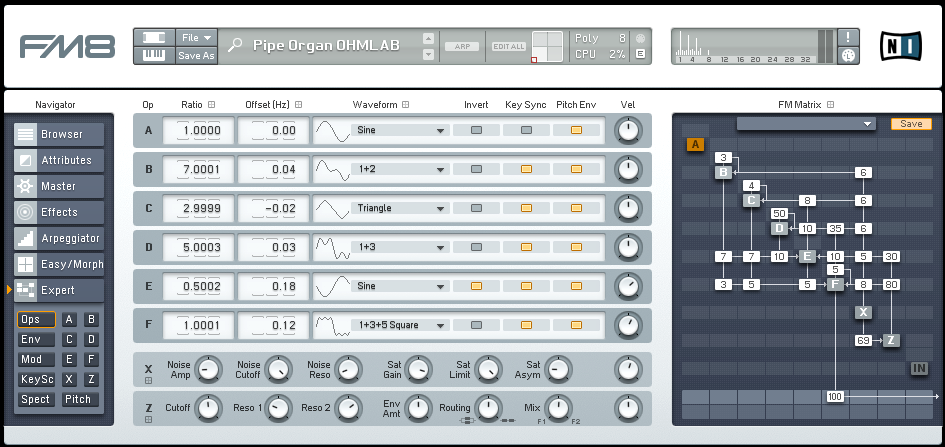
It all starts in the FM Matrix where the routing happens. Here you can see that there is only one Carrier (Operator F), which is routed directly to the main output strip. Operators B-E are acting as Modulators, while Operator X (Noise/Saturator) and Operator Z (Filter) bring additional character and help to further shape the delivery and development of sound. There are many small routing assignments that, in the end, all add up and provide a certain harmonic edge that is needed for this FM8 pipe organ to work across all octaves and retain the characteristics needed to be applicable in multiple genres of music.
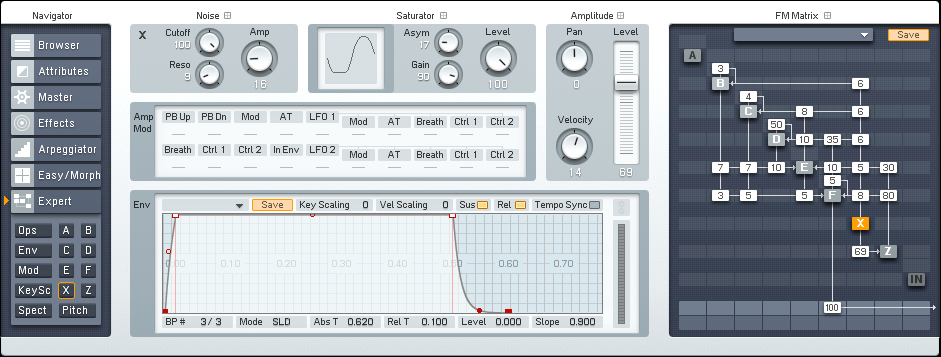
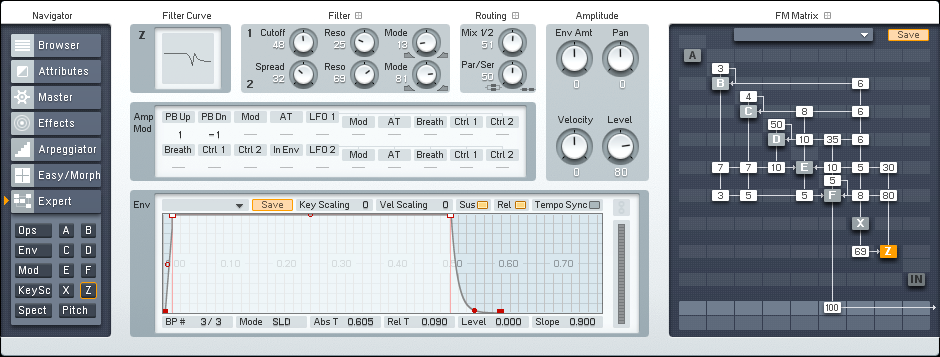
Here you can see the settings of both Operators X & Z. Operator X (Noise/Saturation) adds the air needed to bring this FM8 pipe organ to life and make it more believable. While Operator Z (Filter) focused the the sound.
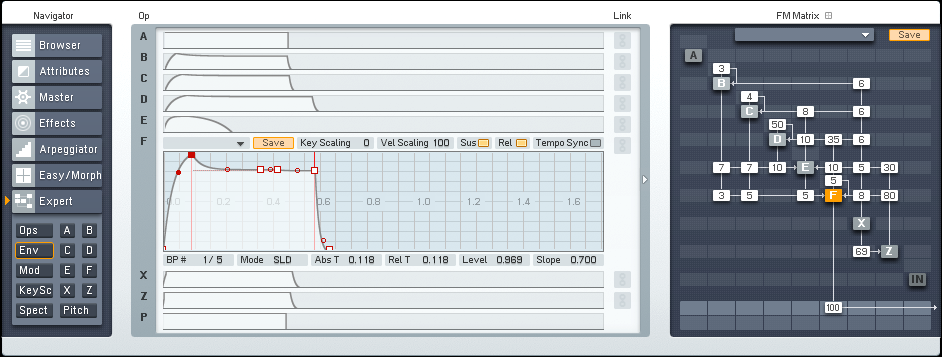
The next big step in designing this FM8 pipe organ is to set up the envelopes for each of the operators in play. As you can see in the image below, there are small differences in each envelope to generate the slightest differences in the delivery and development of our sound. There is no need to match these envelopes exactly when you are recreating it, just keep in mind that small differences in each envelope’s curves can make a big difference in the end.
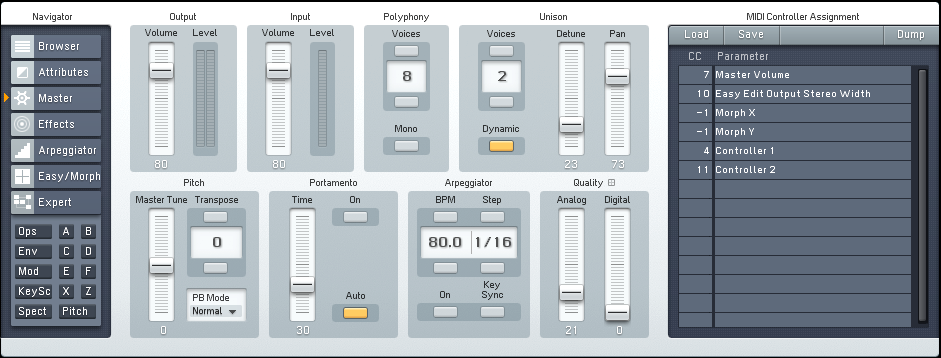
Next, we set up the Master window. Here the total number of Unison Voices is increased to two. Detuning and Panning make our FM8 pipe organ much wider sounding, while a small amount of Analog Quality brings a touch of natural movement and character.
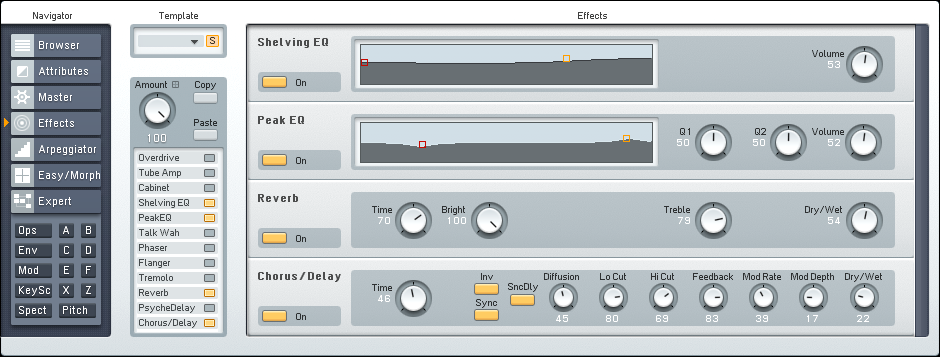
Now the Effects window is set up. Here a Shelving EQ and a Peak EQ are used to finish shaping the sound, while Reverb and Chorus units add the depth and extra room this FM8 pipe organ need to move around in.
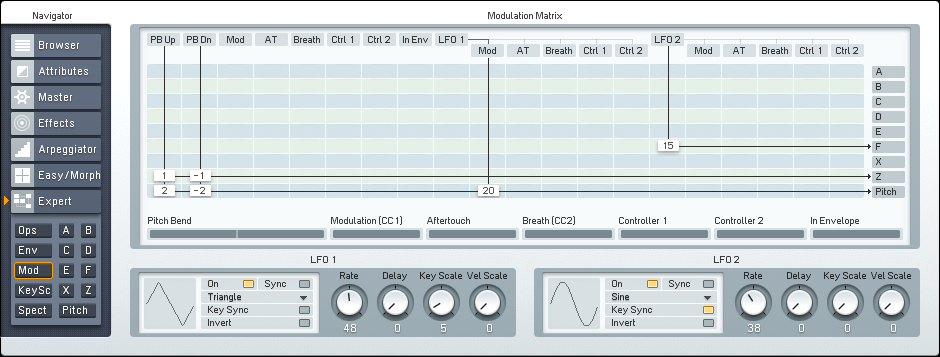
The last step is to add just a touch of Vibrato, and this is easily done by assigning an LFO to Operator F. You can adjust this parameter, as well as the reverb, accordingly to make this FM8 pipe organ work in your projects.
Below is a small audio example of this FM8 pipe organ in action. No processing of any kind has been applied outside of FM8.
[audio:https://www.fm8tutorials.com/wp-content/uploads/2013/03/FM8-Pipe-Organ.mp3|titles=FM8 Pipe Organ]Cheers,
OhmLab
Have A Question Or Comment About This Tutorial?
Want to ask a question about this tutorial or perhaps you have something to add ?
Click through to our forum post about this tutorial and join the conversation!
Visit: Making an FM8 Pipe Organ
 YOUTUBE