
FM8 Tutorials
Making a Razor Sharp Reese Bass with Native Instruments FM8
It almost seems as if FM8 was designed to create some of the best Reese style bass synths imaginable. This tutorial shows how to make a razor sharp Reese in no time all.
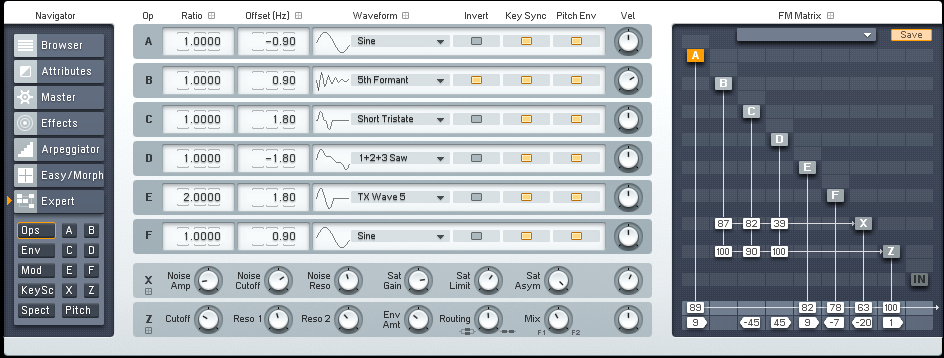
A nice Reese can be made with just a couple of operators, but for this lesson I am going to make a few layers to play with. This will let me make something that will stand out and sound good at a wider octave range and give us a good chance of making a good signature sound, or less generic anyway. Let’s get started with the FM Matrix.
As you can see in the Expert Ops window in the image below, I spent a little time choosing the waveforms I would load into the matrix, as well as how I tuned them. I decided to make a sandwich of sound, if you will. I have three sounds running through a filter and some noise, and three routed directly through to the output. Some of the individual sounds being generated are completely usable on their own, which makes this one a little more versatile than most.
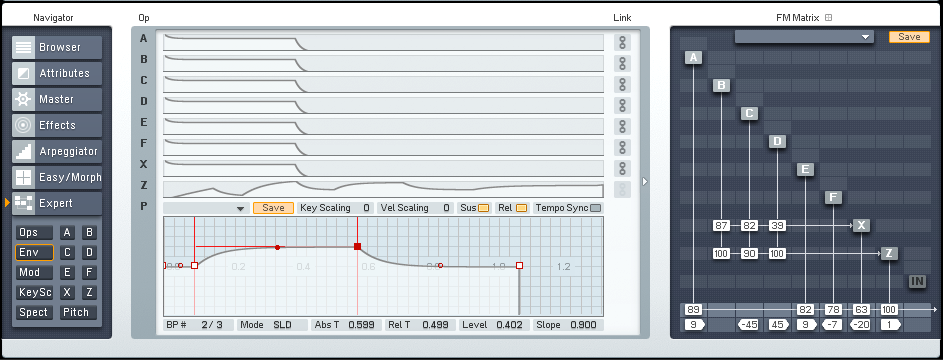
Rather than go through each setting, I will try to use the images to do the bull of that and relate the reasons why things were set up this way. You can enlarge any image by clicking on it. FM8 has a lot of windows, and lucky for us there are some overview windows where we can see a lot of the settings for each operator side-by-side. Like this image of the envelopes, for instance. You can see that all but the filter envelope is a pretty standard curve. I decided to have some fun with that one, because it is a creative way to add a little extra movement to the sound over time. And it’s not just detuning that makes a layered sound like this one entertaining. It is also the layering of various elements that involve harmonics and natural phasing, which in turn add even more movement and character.
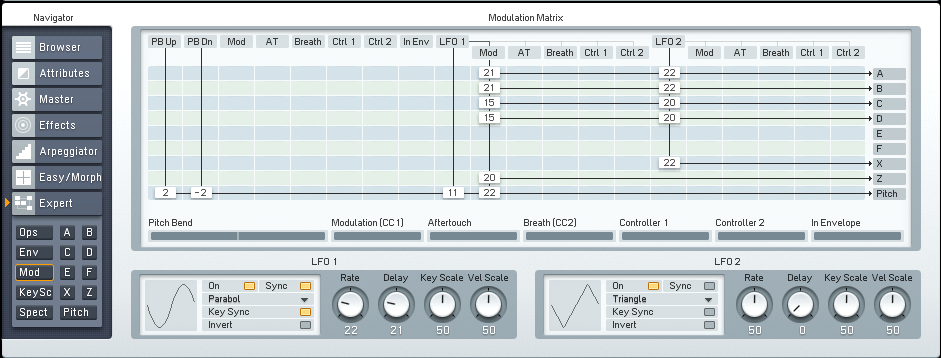
In the Expert Mod screen you can get a better sense of the routing of sounds, as well as the LFOs that have been put into play to generate the slight wobble that makes up for the bulk of the up-front movement in this sound. It does not, however, show you the effects being used. That is in the next image.
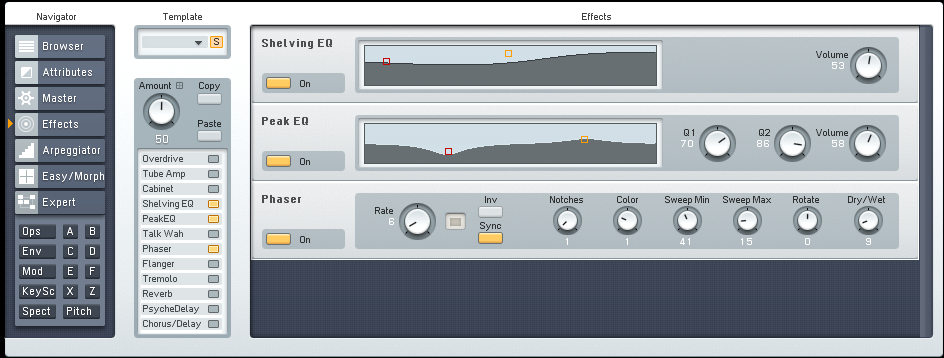
Here you can see that two different EQ effects have been inserted. One is a Shelving EQ and the other is a Peak EQ. Both are accentuating some of the mid-highs and lows, while in essence removing some of the muddier tones in the low-mids. There is also a Phaser at work here to provide a very subtle and slow moving change in frequency emphasis.
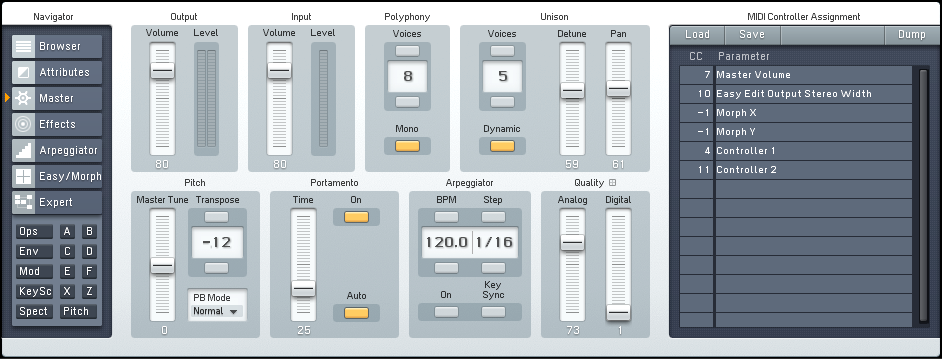
The last steps in making this Reese bass all happen on the Master window. Here we Detune the synth, as well as Pan it to increase the width some. The Unison Voices are increase to 5, and set to Dynamic mode. The Portamento feature is turned on, which allows for gliding between notes. And the entire synth is now dropped one octave by transposing down 12 semi-tones.
The first audio example below is the bass on it’s own. The second example is the bass along side other instruments to give you a better idea of how it may work in a mix. No processing has taken place outside of FM8, nor is the music supposed to sound great.
[audio:https://www.fm8tutorials.com/wp-content/uploads/2012/06/Razor-Sharp-Reese-Bass-Solo.mp3|titles=Razor Sharp Reese Bass Solo] [audio:https://www.fm8tutorials.com/wp-content/uploads/2012/06/Razor-Sharp-Reese-Bass-Full.mp3|titles=Razor Sharp Reese Bass Full]I hope you enjoyed this quick tutorial and that you were able to not only create the Reese bass shown in this example, but take it a couple steps further to make it your own sound to use in a project. If you have FM8 tutorial requests or would like to share one yourself, then please send us a message and we will be happy to help. Thanks for stopping by!
Cheers,
OhmLab
 YOUTUBE