
FM8 Tutorials
Making a Modulating FM8 Pluck Synth
Using FM8 to design this type of sound is a quick and easy process that will also help you become more acclimated to the layout and functionality of the synth. So if you are new to FM8 or just trying to learn more about it, this is a good tutorial to follow along with. There are only a handful of steps involved in making this FM8 pluck synth, but the features used are the primary features to be aware of when designing sounds such as this one. It’s very easy to tweak and make into your own sound, and works well with a wide range of effects and processing. Let’s see how it’s made.
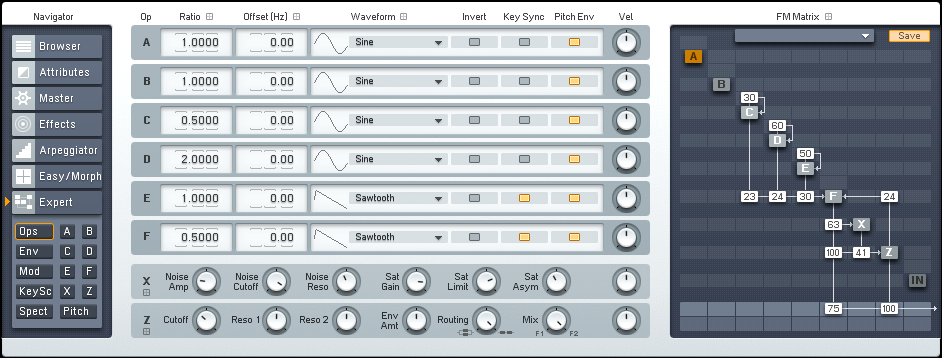
Starting off with the FM Matrix, you can see that the routing for this FM8 pluck synth is a little busy. Although there appears to be a lot happening, it is actually surprisingly simple to recreate and understand. There is only one main oscillator, Operator F. And this is being modulated by for other operators, one of which is the filter module. The main sound is also routed through the noise oscillator, Operator X, before being affected by the Filter. There is not only variation in pitch ratio settings, but also feedback is present in all three of the Modulators. All of this culminates in a sound that will be really nice once we wrangle it in a bit by shaping the operator envelopes. Notice that the Key Sync feature is engage on some of the operators, but not all. This is a good place to start if you are looking to make some small tweaks to the delivery of this FM8 pluck synth.
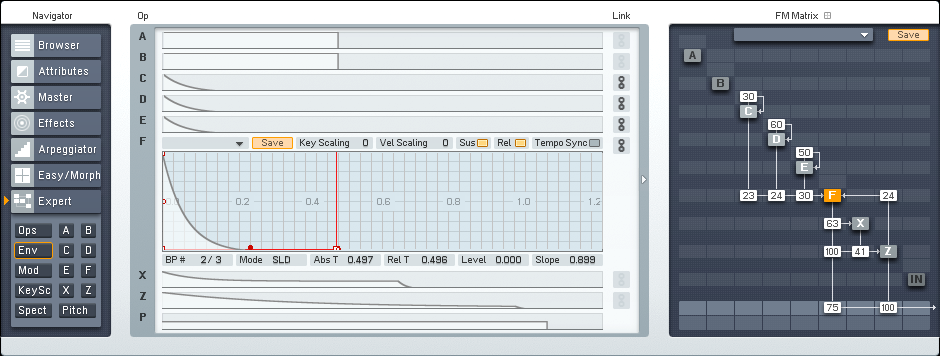
The envelopes for the main operator and modulators are set up using the link feature to ensure consistent development. The noise/saturator and filter operators are set up with their own unique curves.
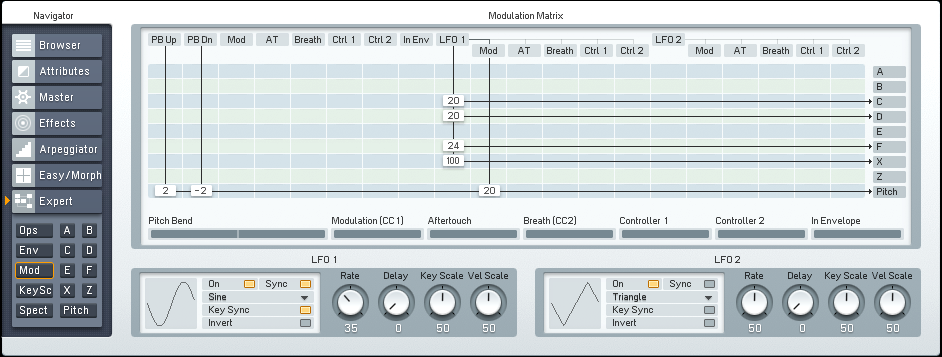
The modulation heard over time in this FM8 pluck synth can easily be increased or decreased by changing the LFO assignment settings on the Expert Mod window. You can also increase phasing by offsetting the pitch parameter values of the operators in the main Expert window.
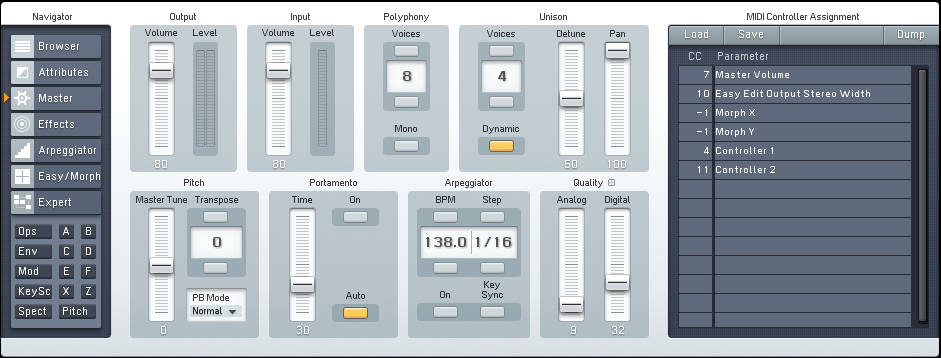
The Master window is where the total number of Unison voices for this FM8 pluck synth is increased to four. Both the Detune and Pan features are used to add more depth and width to the sound. And a small amount of Analog and Digital Quality are added for character.
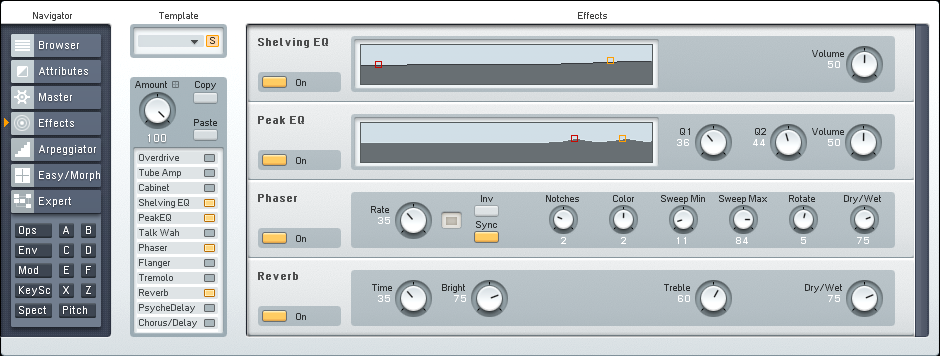
A total of four effects are used on this FM8 pluck synth to finish shaping it. A Shelving EQ and Peak EQ are used to attenuate the low end a bit and accentuate some of the higher frequencies. This helps to keep the sound nice and crisp in its initial delivery. A Phaser is used to provide some extra motion and a Reverb is used to give the synth a little more space to move around in.
Below is a short audio sample of this FM8 pluck synth in action alongside some drums and a simple bass to help give you a better idea of how it may sound in a mix.
[audio:https://www.fm8tutorials.com/wp-content/uploads/2012/11/FM8-Trance-Pluck-Synth.mp3|titles=FM8 Trance Pluck Synth]Remember to shoot us a message before you leave if you have a tutorial request, or would like to share one of your own with the community.
Join The Conversation!
Want to ask a question about this tutorial or perhaps you have something to add to it? Click through to our forum post about this tutorial and join the conversation!
Thanks for stopping by!
Cheers,
OhmLab
 YOUTUBE