
FM8 Tutorials
Creating A Killer Electric Guitar NI FM8 Tutorial
Break away from the preconceived notions that a lot of people have about FM synthesis sound design and learn how to make a shredding electric distortion guitar in this FM8 tutorial, with this quick and easy tutorial from OhmLab
With the latest release of FM8 and it’s rising popularity, I think that frequency modulation synthesis is going through a rebirth, of sorts, in the world of modern musicians and small studio producers.
We have moved completely past 8-bit video game sounds, telephone and microwave sounds and have been seeing very innovative synth design from some of the trend setters in today’s popular music genres. And with people starting to attempt new sounds using FM8, I decided that it’s about time to start sharing ideas that are not something that a lot of people would consider when stepping up to this FM synth. Let’s make an electric guitar, loaded with distortion and ready to be customized to your needs!
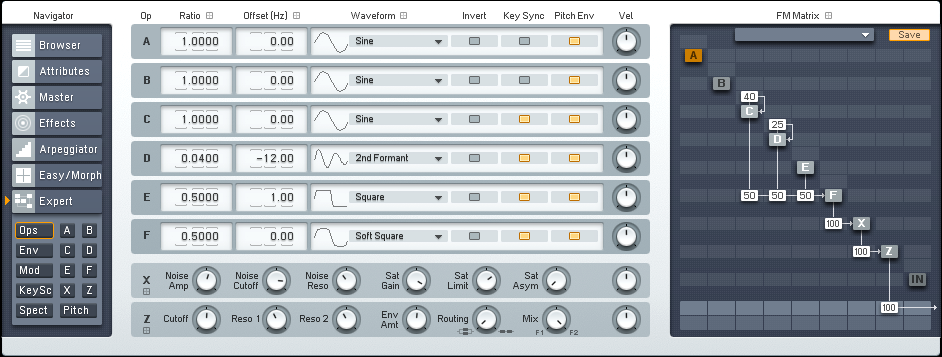
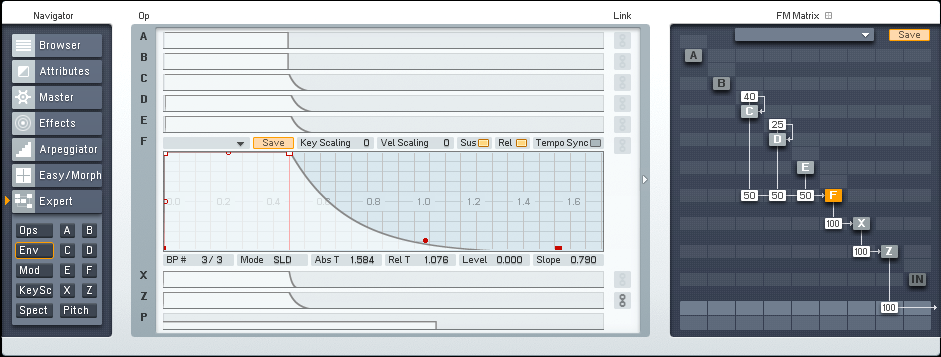
Starting off with the FM Matrix in this fm8 tutorial, you can see that this sound is actually a pretty simple one from a design perspective. It is more about proper proportions and ratios, rather than complex routing. The first image below shows that Operator F is being influenced by Operators C, D and E, as well it being run through both the Noise and Filter operators (Operators X & Z) before going to the main output. The second image shows the set up of the envelopes, which are all basically the same. No changes have been made to the default shape of the curve except extending the release of each envelope. Operator F’s release is a little longer than the rest to help ensure no confusion during the development of the sound.
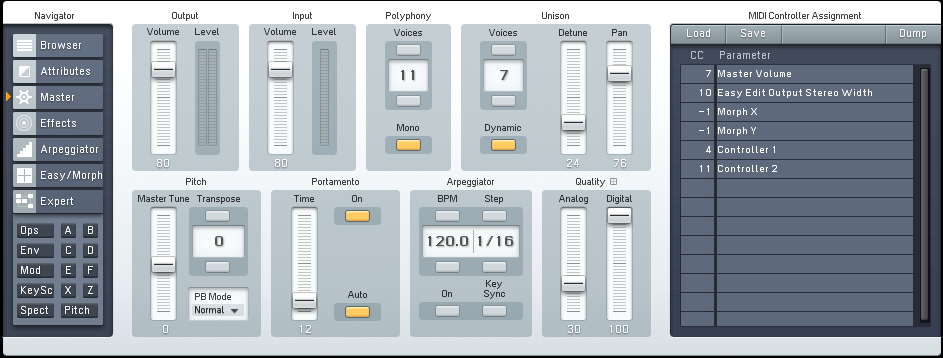
Once the main part of the sound is in place, we can visit the Master window to adjust the voicing, glide, analog and digital quality, panning and detune it a bit. All of this greatly affects how this sound is delivered.
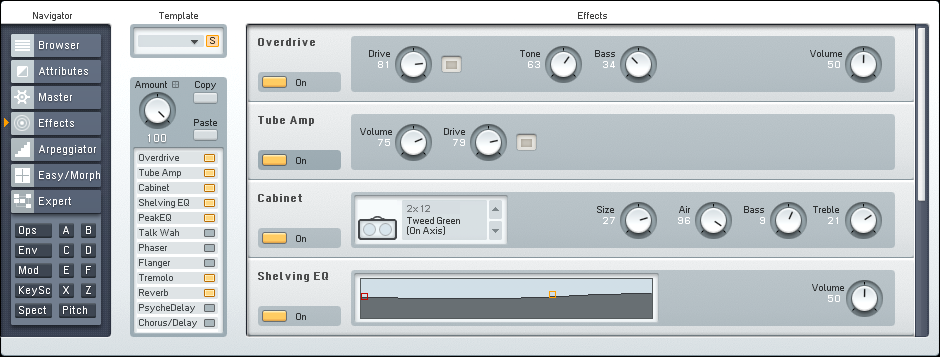
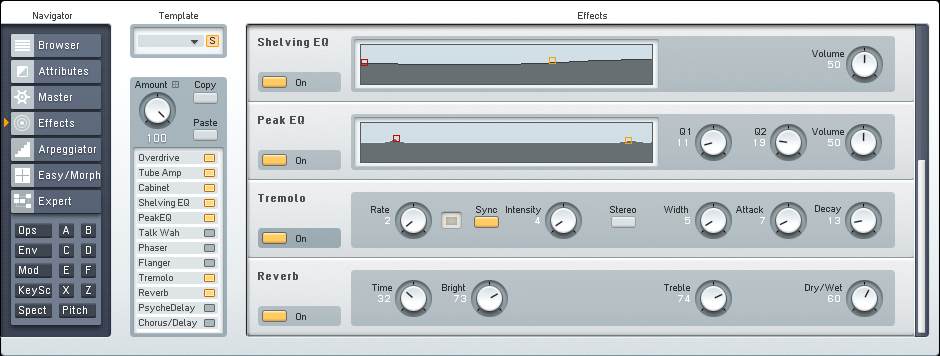
The next stop is the Effects window. Here I have added a total of seven effects to further shape and alter the sound. Starting with Overdrive, Tube Amp and a Cabinet give the sound much more guitar-like qualities and a bulk of the distortion. The Shelving and Peak EQs help to accentuate a few key points of frequency. The Tremolo adds a small amount of movement and the Reverb gives it the space it needs to fully develop and ring out a bit.
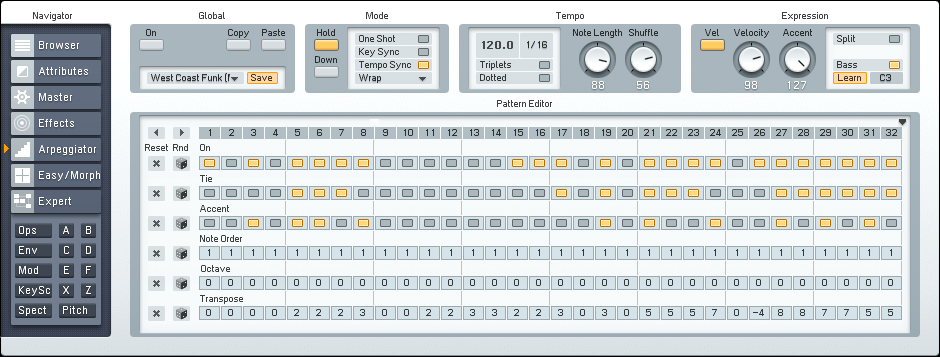
The last step in this process was to activate the Arpeggiator and use it to display the sound for this lesson. It just makes the programming that much easier to use a preset, which is what I did. I chose West Coast Funk, and made a few changes, like extending the note length, turning up the Shuffle, Velocity and Accent parameters. These last few tweaks just help add a human element to the sound so it doesn’t sound too much like a synth trying to be a guitar.
Below is a sample of the guitar sound in action alongside some simple drums so you can get a good idea of how it works.
This sound is now ready to be processed outside of FM8 in your DAW of choice. Although no extra processing has been done to the sound in this recording, I would suggest playing around with some guitar amp plugins, perhaps a little more distortion and probably some kind of saturation after compression has been applied.
If you have a request for an FM8 tutorial or would like to share one of your own, please send us a message today letting us know. Thanks for stopping by!
Cheers,
OhmLab
 YOUTUBE