
FM8 Tutorials
FM8 vs. NI Massive: Dirty Metallic Wobble Synth Tutorial
This should be a very interesting series, and I hope that it is as much fun for all of you to follow along with as it is for me to make them! We also hope that you will be taking part in our ongoing conversation about these great synths, different approaches to sound design and synthesis, new ideas in music and audio production, and general good ol’ fashioned banter about synths. We have recently launched a new synth tutorials forum, which is where we will be. So after you have finished this tutorial, check out the one on our sister site MassiveSynth.com to see how this same sound was made using NI Massive and then meet us in the forums! And without further ado, let’s get started on this wobble synth tutorial!
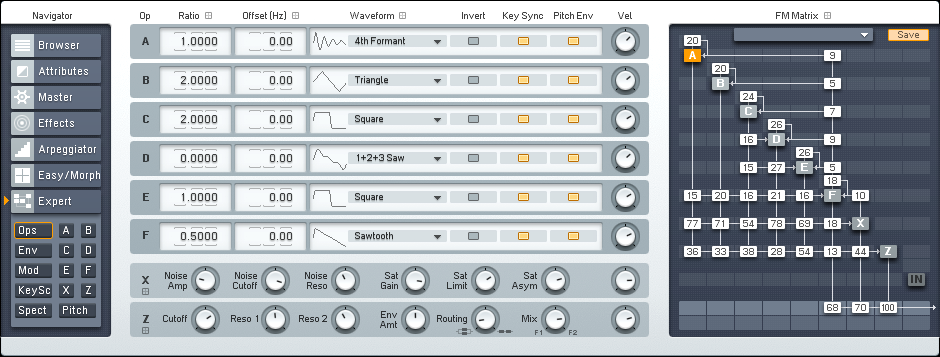
We start at the FM Matrix, and as you can see in the image below there is a lot going on to make this sound. Now in the interest of full disclosure, this sound was first made in NI Massive and then replicated here in FM8. The next time we pit these two synths against each other the sound will originate from FM8 and be recreated in NI Massive. It is always a little tougher to replicate a sound using a different set pf tools, let alone an entirely different approach to synthesis and sound design!
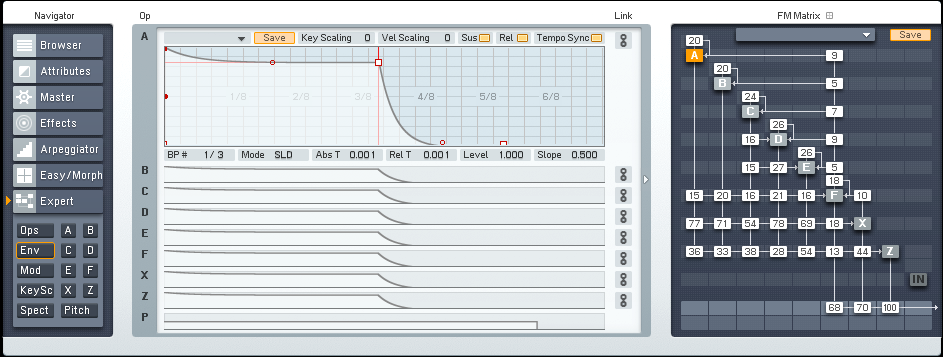
I decided to just keep all of the envelopes identical to ensure an even and consistent delivery. Of course, you can feel free to change this up a bit to make the development of this sound more interesting or carry more character forward.
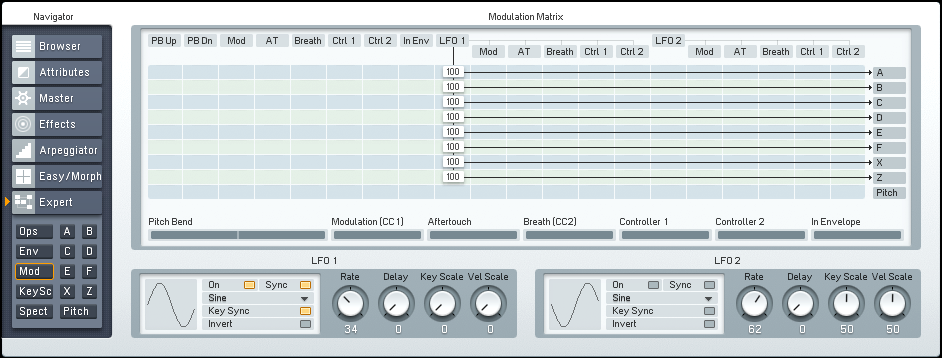
Again, keeping things simple here, I simply assigned the same basic LFO to modulate each of the operators. This keeps them all moving at the same rate, which is incredibly important. If you want to change things up a little, try adding some Tremolo on the Effects window. This is sure to provide some pretty cool results for you.
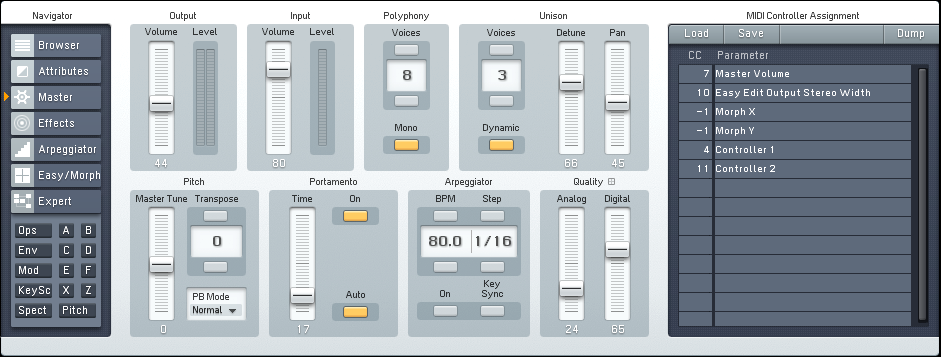
As we progress through this wobble synth tutorial, the next step is to set up the Master window. Here the total number of unison voices is increased to three, and the synth is set to run in mono polyphonic mode. This allows only one to be played at a time and is much better (usually) for synths that glide. And to make this one glide, we need to turn on the Portamento feature. Also, some Detuning and Panning are added , as well as both Analog and Digital Quality. Electing to use these four parameters adds depth, width and character to our sound.
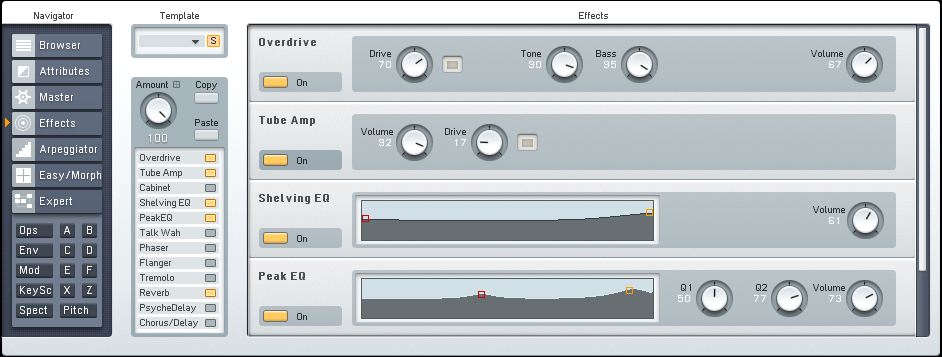
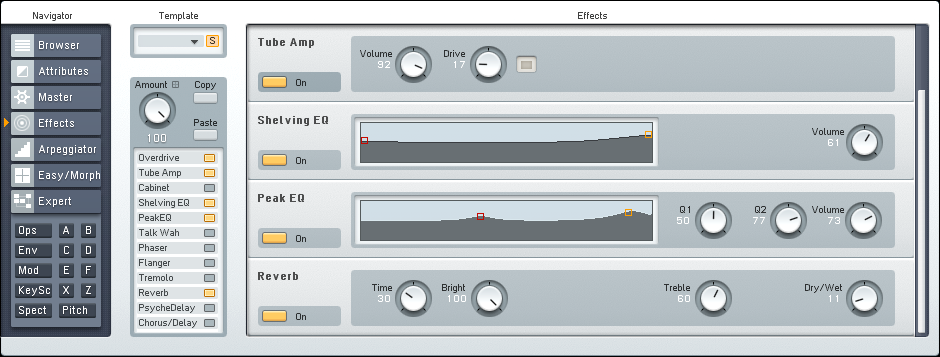
Lastly, a total of five effects are added to the mix. Overdrive and a Tube Amp unit are used to add drive and distortion to our synth. A Peak EQ and a Shelving EQ unit are used to finish shaping the sound. And finally, a touch of Reverb is added to give the sound a little more room to move around in. That wraps up our quick wobble synth tutorial, and we hope you hurry on over to the NI Massive version of this tutorial to see how the original sound was made.
As you will hear in the audio sample below, the synth turned out alright. But you will need to follow the link to our NI Massive tutorial to see how it compares to the original. (It should be noted that the differences between FM Synthesis and Subtractive Synthesis, as well as differences in feature sets and their configurations, mean that truly identical sounds are very difficult to come by when using two very different synths like this. These two sounds are pretty darn close for the time we had to work with.) And once you’ve finished over there, we hope to see you in our new forums!
[audio:https://www.fm8tutorials.com/wp-content/uploads/2012/12/Dirty-FM8-Metallic-Wobble.mp3|titles=Dirty FM8 Metallic Wobble]Remember to shoot us a message before you leave if you have a tutorial request, or would like to share one of your own with the community.
Join The Conversation!
Want to ask a question about this tutorial or perhaps you have something to add to it? Click through to our forum post about this tutorial and join the conversation!
Visit FM8 VS. NI MASSIVE: DIRTY METALLIC WOBBLE SYNTH TUTORIAL
Thanks for stopping by!
Cheers,
OhmLab
 YOUTUBE