FM8 Tutorials
Designing Better Ambient Pluck Synths in FM8
This quick tutorial shares a few key tips on how to design better ambient pluck synths with FM8. These same ideas can be applied to help you with many other sounds, too!
Sound design is an incredibly fascinating part of music and audio production and the longer you do it, the better you get at identifying the various things that come together to help make a truly great sound. But there are also many best practices that you can incorporate into your workflows that can ensure that your sounds will work well in a mix, long before you ever complete the sounds. This lesson in designing ambient pluck synths with FM8 is more an exercise in practicing the idea of less is more and how to create big lush sounds from very simple ideas. Let’s jump right into this.
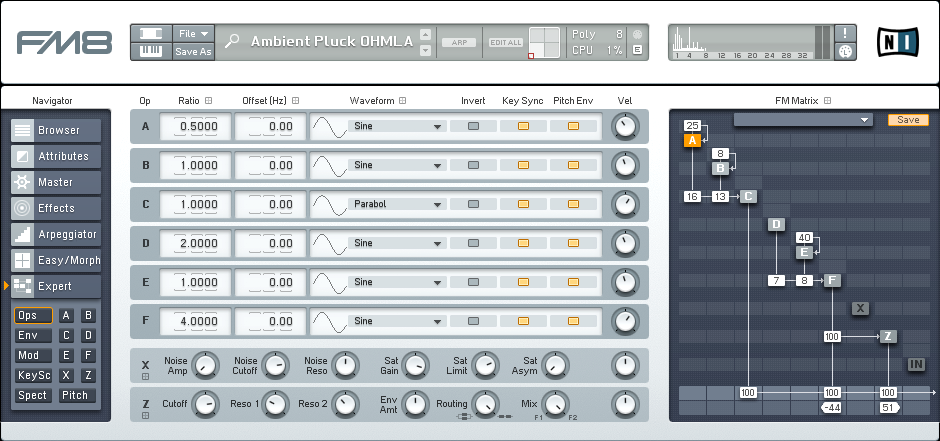
Here in the FM Matrix the core of the sound is built. As with many styles of ambient pluck synths, you can see that the programming is actually quite simple. This is the first step towards a successful patch of this kind. We want the sound to be clear and concise, but there also needs to be a great deal of width and depth. Notice that the Ratio values are all dialed in so that there is no uncontrolled phasing or movement originating from this area. The low-end element in this patch is centered, while the high-end element has been split and panned in opposite directions. This takes care of the width we were after.
Pro Tip: Bring out more high frequency presence and textures in a sound like this one by routing an operator back into itself, generally known as feedback.
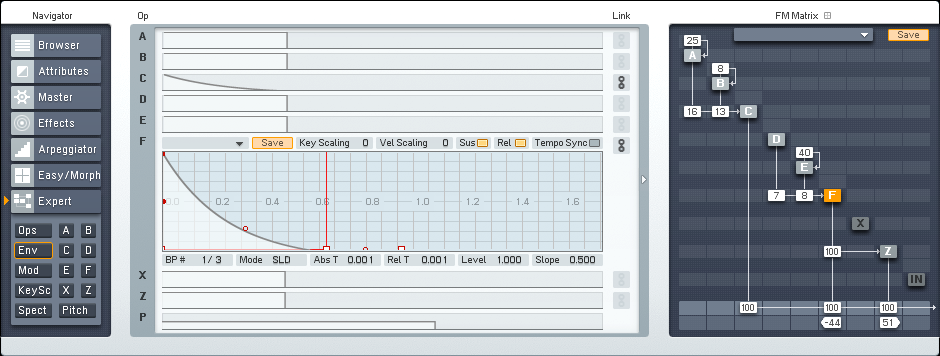
The only major thing to worry about on the Envelope window is that the main carriers, both Operators C and F, have an envelope curve that is consistent with pluck synths and that their release parameter has been extended a bit to avoid any unwanted clicking when notes are played.
Pro Tip: Using the Link feature in the FM8 envelope window will help ensure more consistent delivery and development of sounds in your patches and save you time.
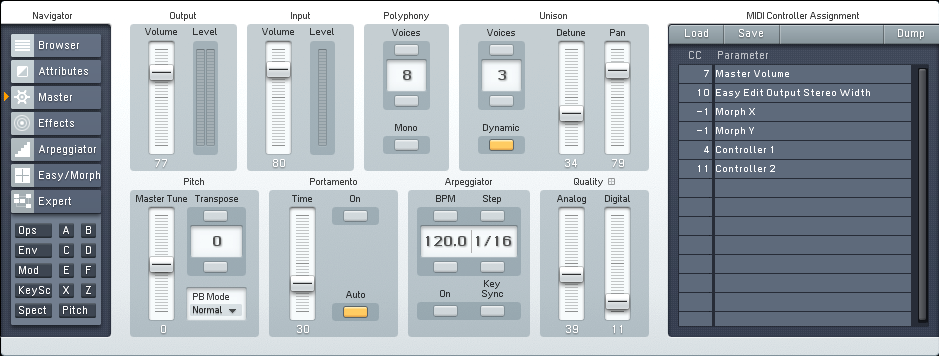
The total number of Unison Voices is increased to three on the Master window. These voices can now be spread out via the Detune and Pan features, bringing more width and depth to the sound. A small amount of Analog and Digital Quality are also added to help add a bit more character, texture and movement within the sound.
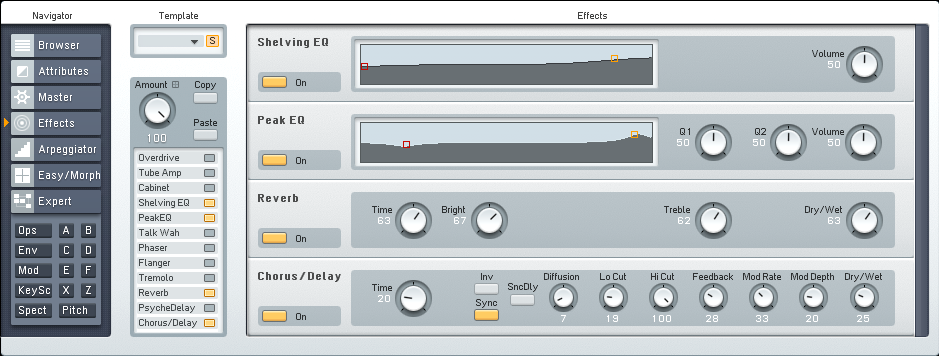
The final step in designing these types of pluck synths is to set up the Effects window. Shelving and Peak EQ units are used to shape the patch and manipulate the necessary frequency ranges need to achieve the desired sound. The Reverb effect provides more space for the sound to develop and resolve in, while the Chorus/Delay unit adds a little thickness and extends the sound more.
Pro Tip: Using effects like reverb, chorus and delay in the actual synth patch helps a sound stand out through isolation, as it exists in its own space from the very beginning.
Here is a small audio sample of this synth in action. No processing of any kind has been applied outside of FM8.
[audio:https://www.fm8tutorials.com/wp-content/uploads/2013/09/Ambient-Pluck-Synth.mp3|titles=Ambient Pluck Synth]Cheers,
OhmLab
Have A Question Or Comment About This Tutorial?
Want to ask a question about this tutorial or perhaps you have something to add ?
Click through to our forum post about this tutorial and join the conversation!


 YOUTUBE