
FM8 Tutorials
Designing an Agressive and Flexible FM8 Dubstep Bass Synth
Get ready, because this tutorial is going to delve into the FM8 envelope system. Don’t worry though, it is a very easy lesson to follow along with and touches on a few things that should help you in designing future sounds of this kind. The end result should be a flexible FM8 dubstep bass that is agressive and able to be used as a straight synth, a wobble or even a more complicated sound. The synth itself only takes about two minutes to make. After that it is up to you how you want to use ut in your music.
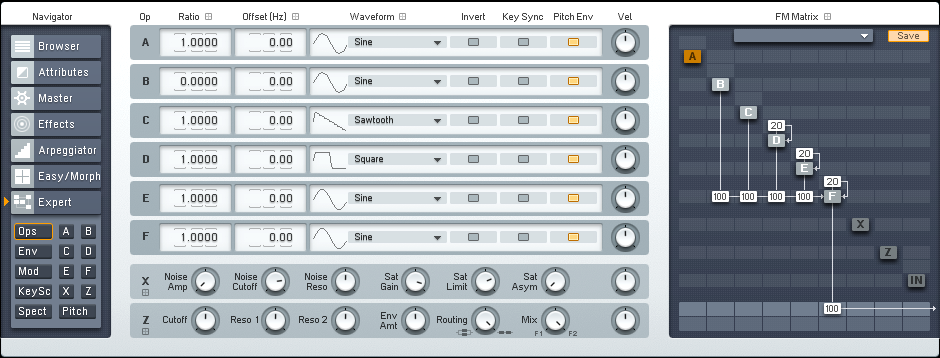
Starting with the FM Matrix, you can see that the sound is actually very simple to set up. With only one operator routed to the main output strip, Operators B-E are being used as modulators. This is just one way that this FM8 dubstep bass is kept simple enough to be used as both a bass synth and as a lead, if that is what you need from it.
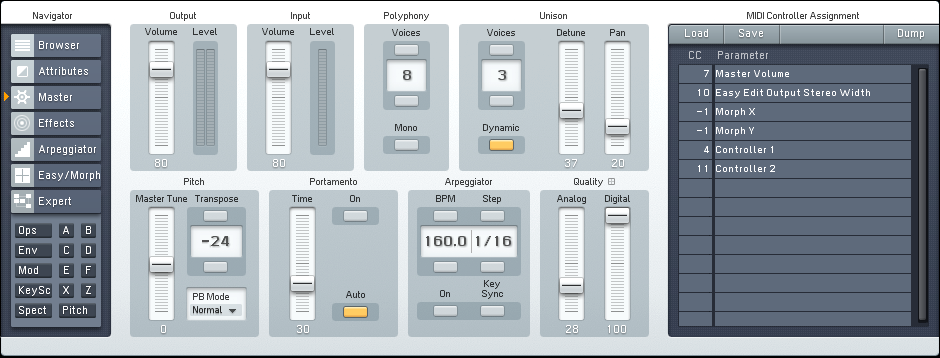
Now to set up the Master window. Here the total number of Unison Voices is increased to 3 and the entire synth is transposed down two octaves. Some Dentuning and Panning are used to spread the sound ou a bit, but not too much. And a lot of Digital Quality alongside a small amount of Analog Quality are added to achieve a true dubstep sound.
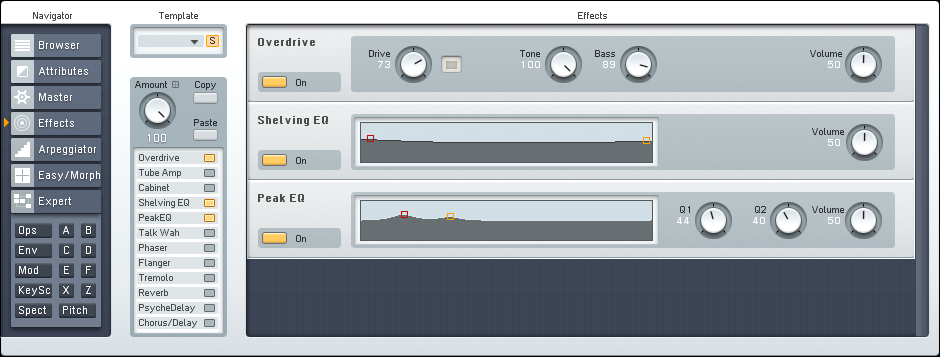
Now the Effects window is set up. Here an Overdrive unit is added to help bring out the edge of this FM8 dubstep bass synth, while a Shelving EQ and a Peak EQ are used to finish shaping the sound.
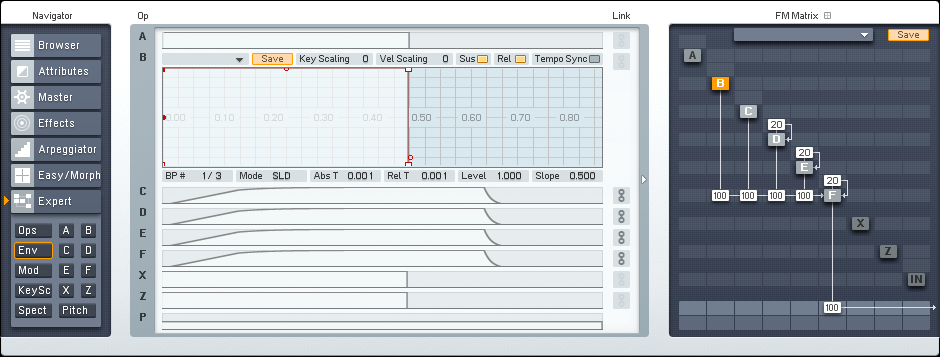
Finally, we get to the envelopes. Normally would have set up the main envelopes already, but for this sound I wanted to wait until the Master and Effects windows were dialed in before changing how our FM8 dubstep bass is delivered. This way, what we hear while setting up the envelopes curves is more accurate and revealing. Here you can see that the main operator envelopes pretty much all follow the same curve. You can use the Link feature to make this easier. If you want a different delivery, simply change the curve shape while in Link mode engaged and all linked envelopes will be changed at the same time. It’s a very quick way to sample your different options!
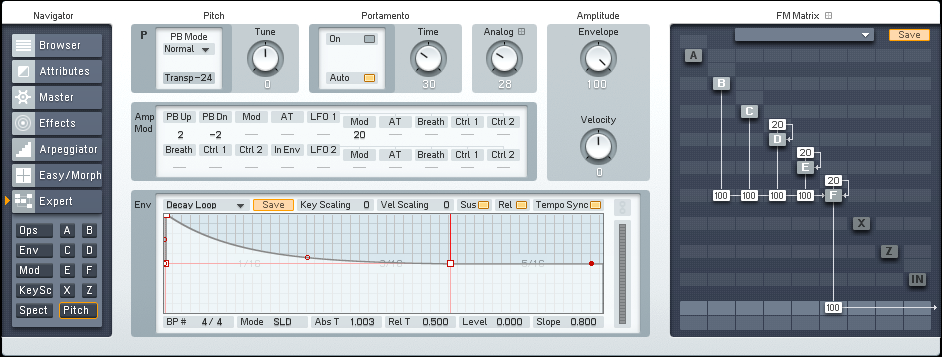
Usually, we would be finished with the tutorial at this point. But I want to take a few more moments to share how to use the Pitch Envelope to change this FM8 dubstep bass quickly and easily. Here is a small audio sample of the synth as it is now.
[audio:https://www.fm8tutorials.com/wp-content/uploads/2012/12/FM8-Dubstep-Bass.mp3|titles=FM8 Dubstep Bass]Here is the same exact synth with this envelope curve affecting the amplitude at 100%.
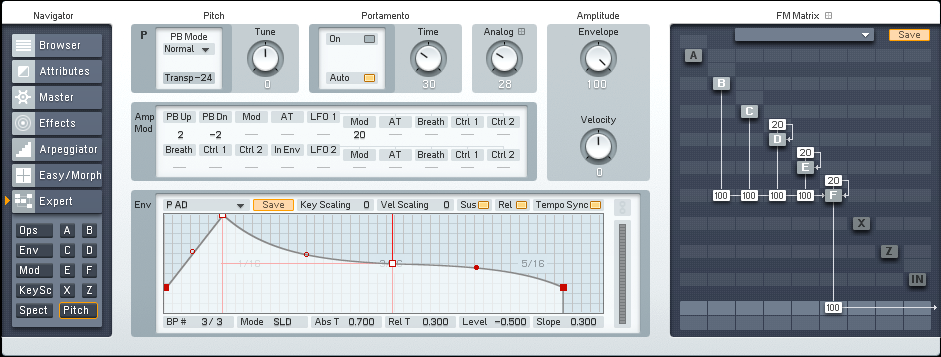
[audio:https://www.fm8tutorials.com/wp-content/uploads/2012/12/FM8-Dubstep-Bass-Lazer.mp3|titles=FM8 Dubstep Bass Lazer]And again with a different curve affecting the amplitude at 100%.
[audio:https://www.fm8tutorials.com/wp-content/uploads/2012/12/FM8-Dubstep-Bass-Climbing.mp3|titles=FM8 Dubstep Bass Climbing]And one more, with the amplitude envelope set to just 20%. Just imagine the things you can do by automating or MIDI mapping the Amplitude Envelope knob in this one window alone, and what that can bring to your recordings and performances. Of course, there is almost no limit to the things that you can do with a sound like this one!
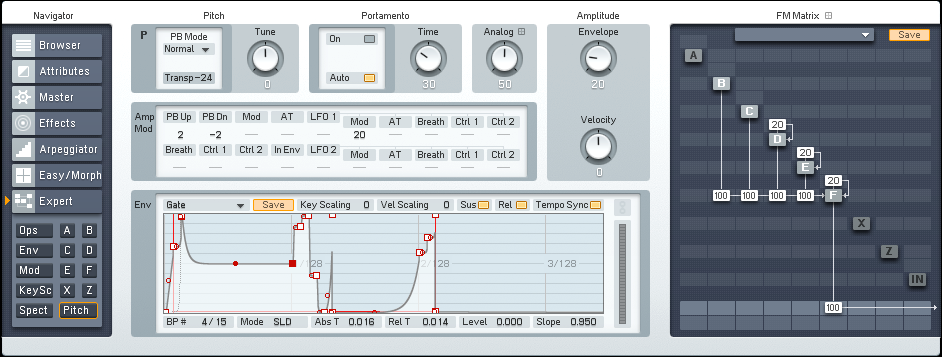
[audio:https://www.fm8tutorials.com/wp-content/uploads/2012/12/FM8-Dubstep-Bass-Nasty.mp3|titles=FM8 Dubstep Bass Nasty]Remember to shoot us a message before you leave if you have a tutorial request, or would like to share one of your own with the community.
Join The Conversation!
Want to ask a question about this tutorial or perhaps you have something to add to it? Click through to our forum post about this tutorial and join the conversation!
Visit DESIGNING AN AGRESSIVE AND FLEXIBLE FM8 DUBSTEP BASS SYNTH
Thanks for stopping by!
Cheers,
OhmLab
 YOUTUBE