
FM8 Tutorials
Designing a Rhythmic FM8 Synth Around a Beat
[aside title=”Pro Tip!“]Try starting with some of the envelope curve presets to get you started on your first rhythmic FM8 synth![/aside]
Really good music often times features different elements playing off of each other through out the music. Making your own rhythmic FM8 synth with the flexible envelope system is one way to ensure it will work well with your beat. In fact, if you do it correctly, you can even get to the point where your synth and your drums are a symbiotic force in your music, creating a groove that is greater than the sum of its parts. The trick is to not force it and to stay away from the cheesy call and response approach that never really seems to come across as you may hope. Instead, try picking up some of the offbeat and accent notes missing from your beat and incorporate them into the rhythm of the synth you create. This lesson is primarily about programming in the envelope system, rather than the sound design involved, so we will quickly toss together a sound and move onto the good stuff.
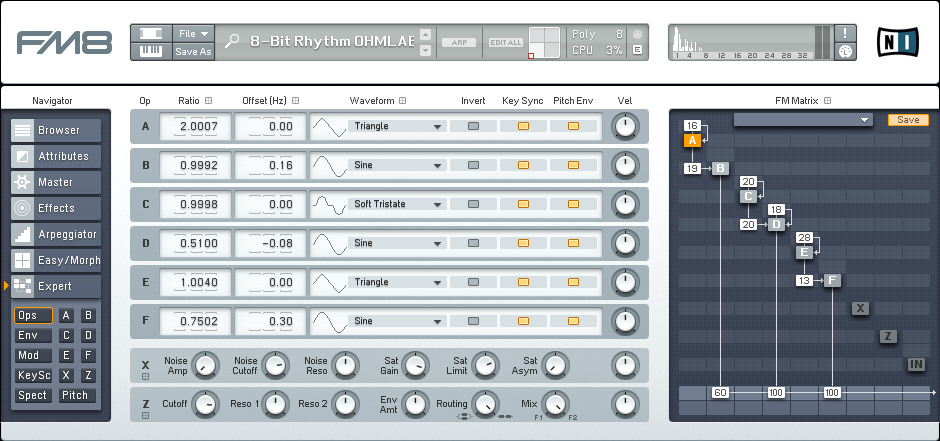
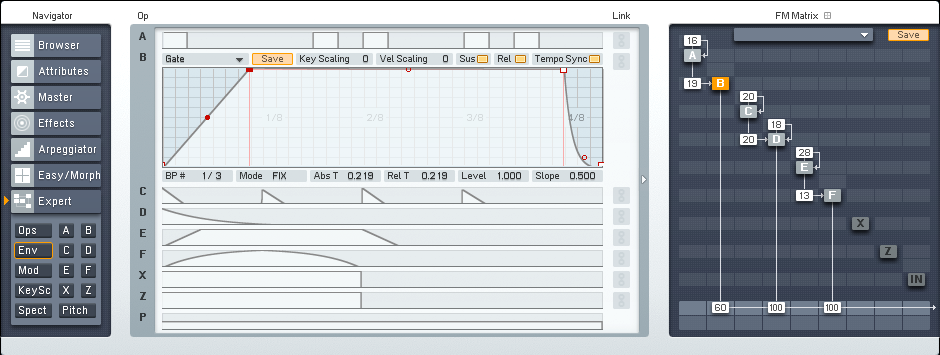
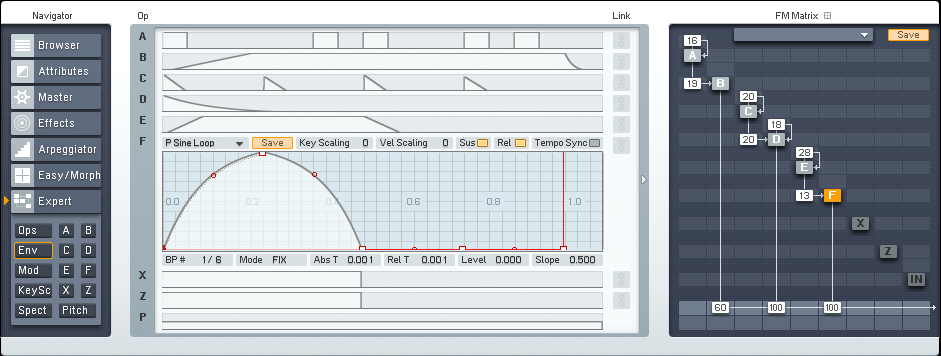
The big thing to take away from the sound design portion of this tutorial is that when you are making a rhythmic FM8 synth like this, it is usually best to create a few different layers that you can work with independently. This gives you much more control and flexibility when it comes time to set up your envelopes. As you can see in the image of the FM Matrix below, I went with three main layers. Each layer is comprised of a Carrier and a Modulator. The differences in pitch will help separate the sounds a bit and allow us to make the sound more complex without worrying about it becoming too busy or convoluted.
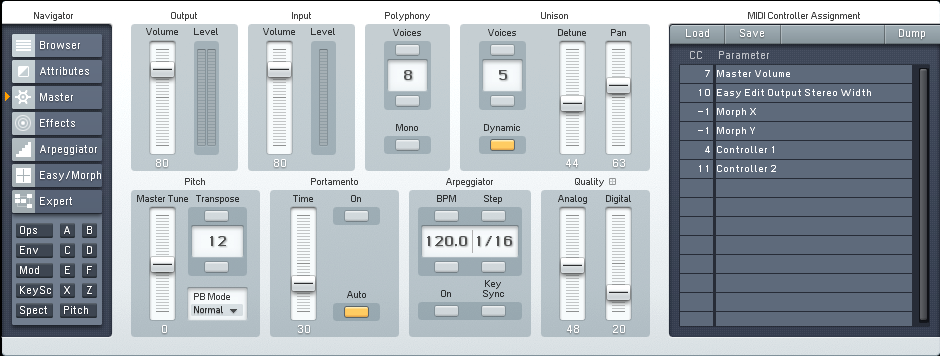
Next, I increased the number of Unison Voices to five on the Master window, and spread them out via the Detune and Pan features to get a deeper and wider sound with a bit of movement. I also added a touch of Analog and Digital Quality for character. The entire synth has been pitched up one octave, as well.
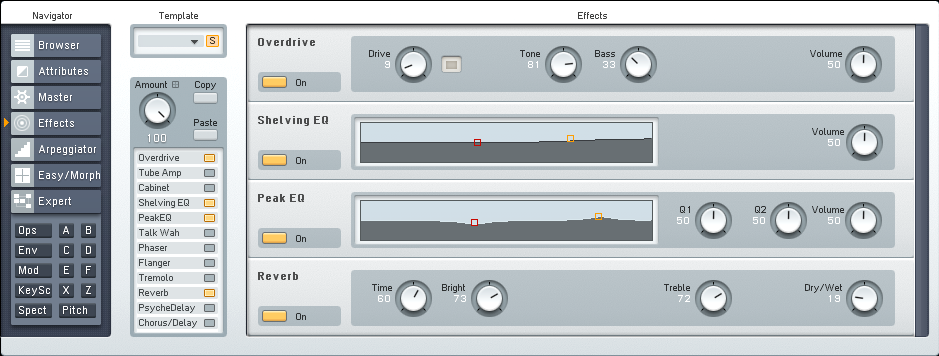
A quick stop at the Effects window gives us a chance to add a touch of grit from an Overdrive unit, shape the sound with some EQ units and give it a bit more space to move around in with the addition of some subtle reverb.
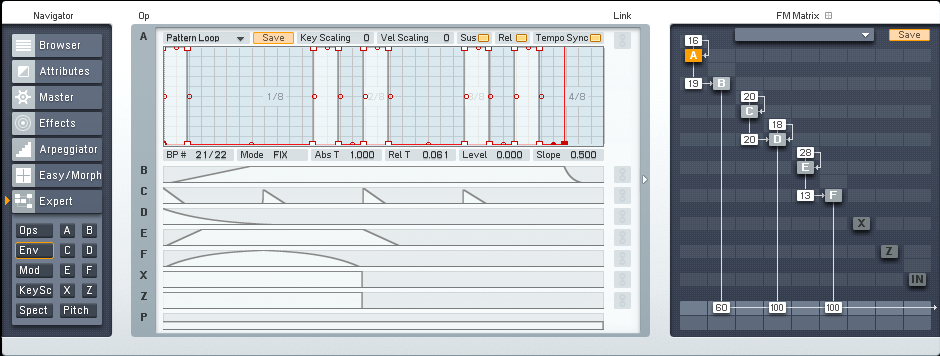
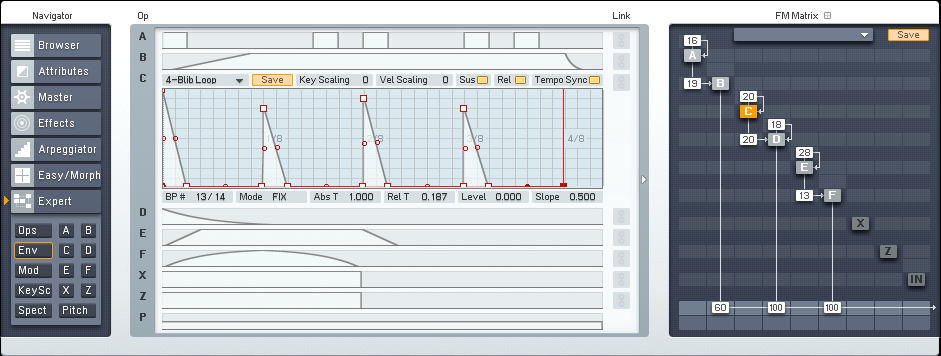
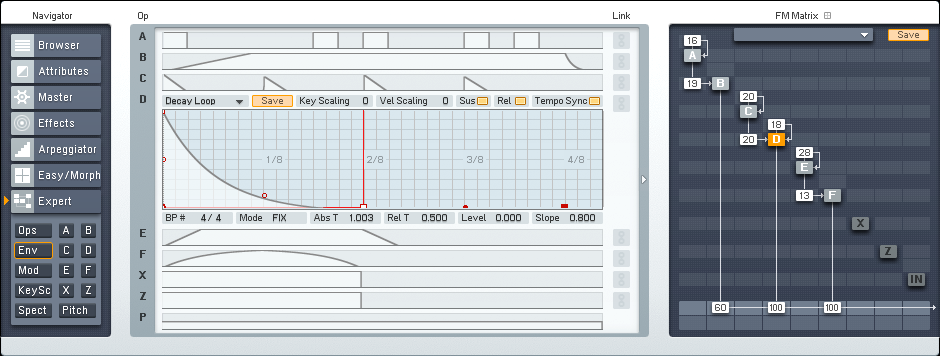
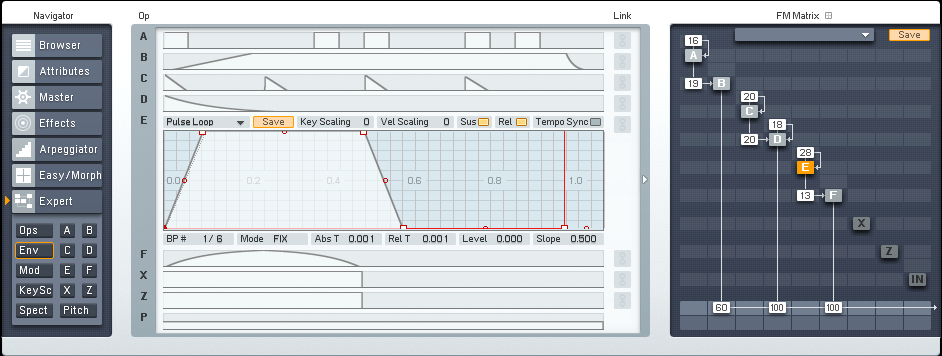
Now we can get into the good stuff. This is where we transform our sound into a rhythmic FM8 synth! I have included a shot of each of the operator envelopes in order, from A to F. You can see that each one has its own unique curve, or set or curves. I selected each one while listening to a single beat. Since there are only three layers, and six oscillators in action, it provides us with more options and potential outcomes while keeping it all rather simple to listen too. And this is another key to making a successful rhythmic FM8 synth made to work with a specific beat–you gotta keep each element simple. One more tip before we move on, keep your envelopes time synced to help keep everything lined up and consistent.
Below is a small audio sample of the simple analog beat on it’s own and then with the rhythmic FM8 synth playing alongside it. No processing of any kind has been applied outside of FM8 and what has been shown in the above pictures.
[audio:https://www.fm8tutorials.com/wp-content/uploads/2013/08/Rhythmic-FM8-Synth.mp3|titles=Rhythmic FM8 Synth]Cheers,
OhmLab
Have A Question Or Comment About This Tutorial?
Want to ask a question about this tutorial or perhaps you have something to add ?
Click through to our forum post about this tutorial and join the conversation!
 YOUTUBE