
FM8 Tutorials
Designing a More Interesting Dissonant FM8 Pad
There are many factors that are involved in making a really good dissonant FM8 pad, but this tutorial will focus specifically on incorporating depth, texture, atmosphere and a sense of randomness.
I have chosen to work with a dissonant type of synth in this example because it frees you up to be more creative and accepting of what you come up with while trying out this approach to designing FM8 pads in general. Elements like atmosphere and texture are just as important a depth and width, because they all work together to make your sounds more immersive and appealing. Making sure that your dissonant FM8 pad also has a feeling of randomness and slow undulating changes over time is a great way to help ensure that your audience will remain interested and even hypnotized, not knowing what to expect next.
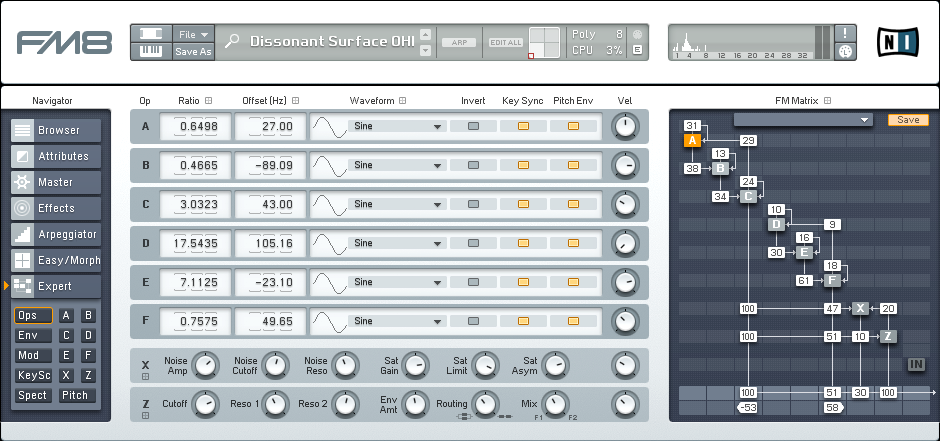
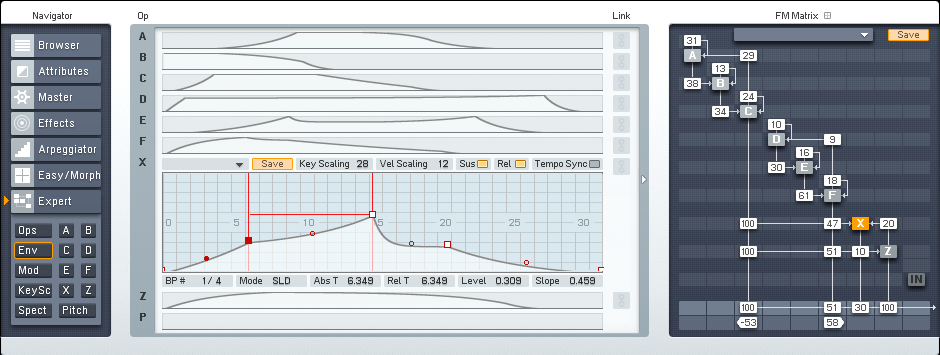
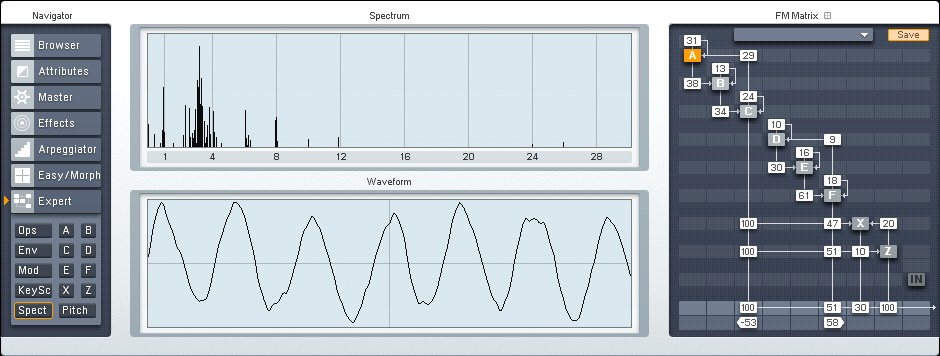
As you can see in the image of the FM Matrix, the routing of this dissonant FM8 pad is fairly unique, yet it only utilizes basic sine waves to generate everything you hear in the end. Using such odd Ratio values and aggressive Offset values helps create not just a nicely layered and complexly dissonant synth, it also helps create textures and harmonics that shine through the rest of the synth to deliver a great deal of character and interest right from the very start. Using a touch of feedback on so many of the operators helps build up even more texture and harmonic elements.
Pro Tip: Less is more! Keep your feedback and modulator routing subtle and minimal to achieve a more appealing and less jarring dissonant FM8 pad.
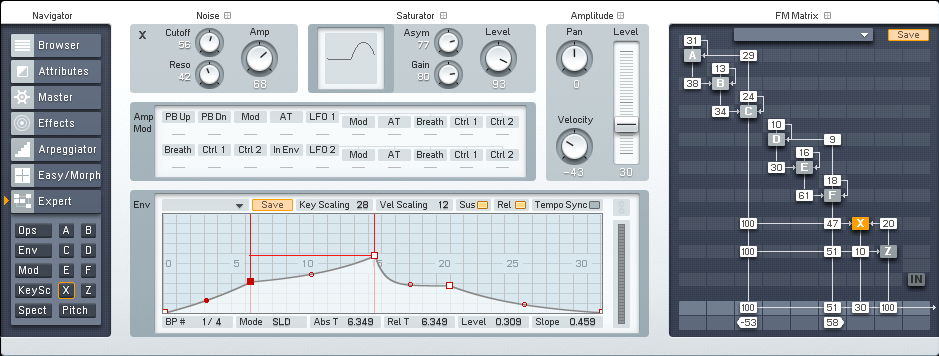
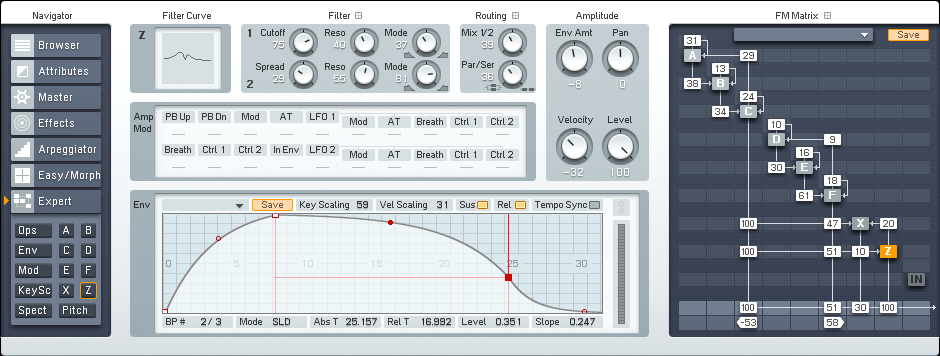
Operator X (Noise/Saturation) is being used to add gentle noise and saturation, as well as a steady signal right down the middle of the stereo field. Operator Z (Filter) also runs right down the middle. This is important because the two main Carriers in this Patch, Operators C and F, are panned in opposite directions to create a wider dissonant FM8 pad over add.
Pro Tip: Routing a bit of Operator X into Operator Z helps provide moving texture, mainly from the noise, that provides a nice atmospheric touch.
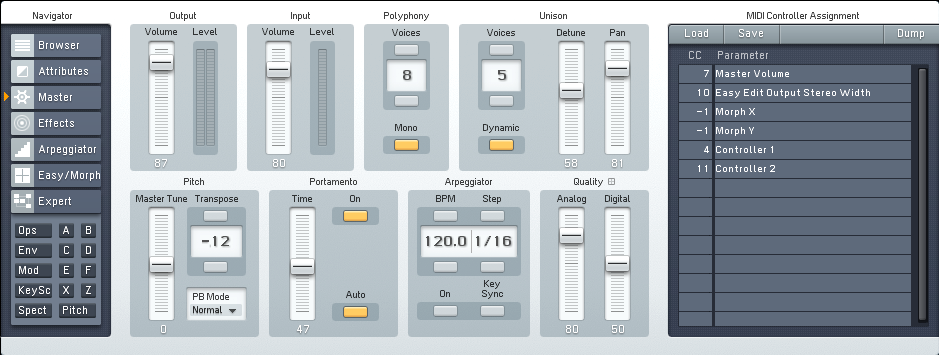
Before we go any further with this dissonant FM8 pad, let’s set up the Master window real quick. The total number of unison voices is increased to five, and those voices are then spread out via the Detune and Pan parameters. Digital and Analog Quality are also added for more character. The entire synth is transposed down one octave and is set to run in Mono mode so we can also take advantage of the Portamento (Glide) feature.
Let’s take a look at the envelopes I have set up for the operators in this patch. One ting that can make a huge difference in your dissonant FM8 pads is to vary the curves and overall shapes of the envelopes in play. This adds more depth to your sound by separating the various oscillators used, which is heard as they weave in and out of each other, affecting the entire synth with every subtle movement. This also helps to generate a feeling of randomness, not knowing exactly what comes next.
Pro Tip: Try randomly creating envelope curves for some of your operators so even you are surprised with what your synth ends up doing as the sound develops over time.
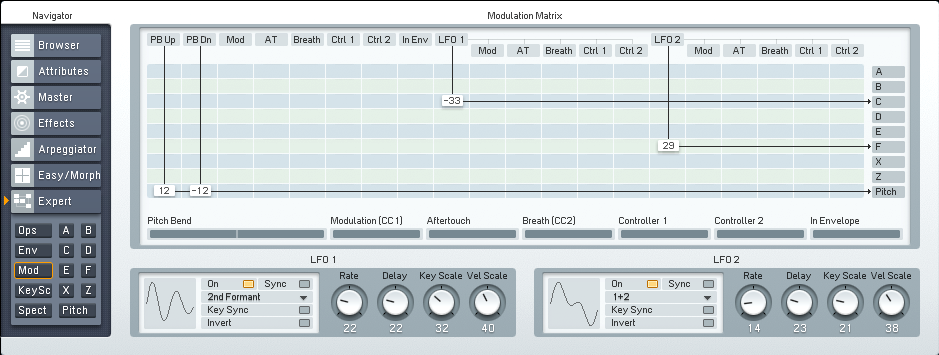
Adding just a touch of subtle movement through some LFO modulation assignments is a perfect way to increase the sense of randomness in your dissonant FM8 pad. As you can see in the image below. I have selected two different waveforms, left the LFOs un-synced and I have also set the Delay, Key Scale and Velocity Scale parameters differently on each one. These small details end up making a very big difference in relation to which notes are played and for how long.
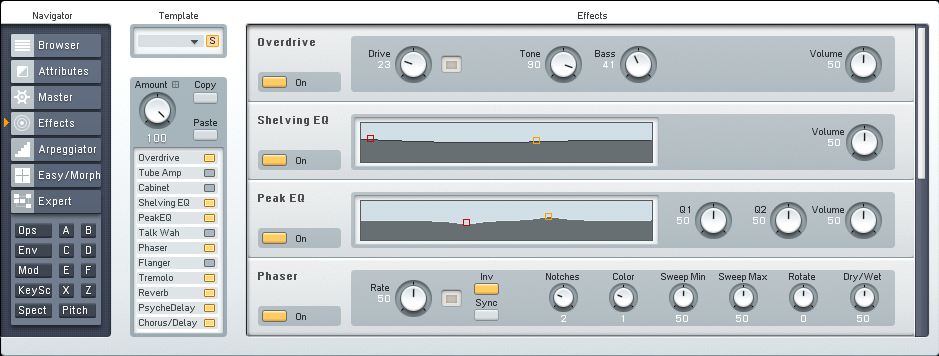
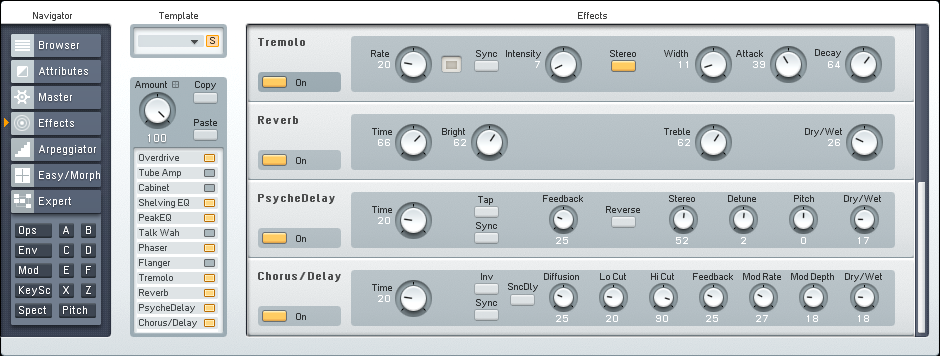
The Effects window is the last stop in this lesson. Here an Overdrive unit is used to add punch, drive and help elevate the overall presence of this dissonant FM8 pad. EQ units are used to finish shaping the sound. A Phaser and a Tremolo effect are both added for extra movement and modulation. The Reverb provide the sound with more room to develop in, while the PsycheDelay and the Chorus/Delay units are extending the sound, producing a thicker and deeper pad.
Pro Tip: Try to match up some of the shared parameters between some effects, while leaving other varied greatly. This will also help add to the sense of randomness.
Here is a small audio sample of this dissonant FM8 pad in action. No processing of any kind has been applied outside of FM8. The first note change is drastic so you can here the different rates of modulation in relation to the notes being played.
[audio:https://www.fm8tutorials.com/wp-content/uploads/2013/10/Dissonant-FM8-Pad.mp3|titles=Dissonant FM8 Pad]Cheers,
OhmLab
Have A Question Or Comment About This Tutorial?
Want to ask a question about this tutorial or perhaps you have something to add ?
Click through to our forum post about this tutorial and join the conversation!
 YOUTUBE