
FM8 Tutorials
Designing a Driving Analog Synth with FM Synthesis
This quick tutorial shares how to easily program a driving analog style synth with FM Synthesis inside of FM8.
There are many ways to create analog style synths with modern software synthesizers, but FM Synthesis seems to have an edge on some certain types of sounds that fall under this umbrella. If you are wanting an especially edgy and driving analog sounding synth, then perhaps this lesson will help you nail down what you’re after. We will use mainly Sine waves to build up this instrument, with some Parabols providing some low end thump for added impact. This is exactly the type of maneuver you can easily do with FM Synthesis, compared to other kinds of synthesis. I personally love to experiment with mixing very subtle, or downright inaudible operators, that are simply used for manipulating the overall spectrum of sound, and FM8 happens to make this all very easy to do!
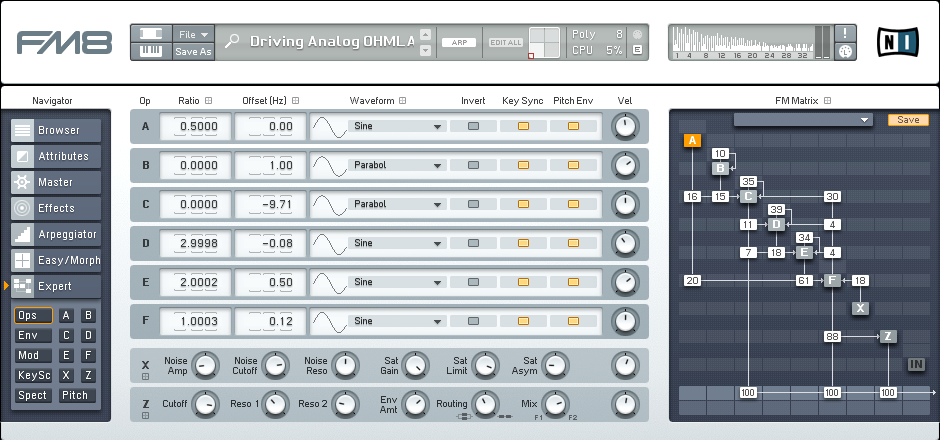
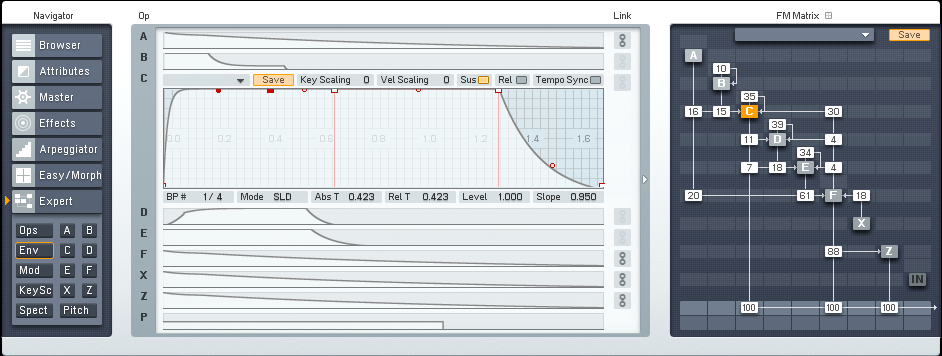
Starting with the FM Matrix, you can see that this is a rather basic patch with Operator F being the main Carrier. Operators B and C are being used as both Modulators and for a supporting thumping element that helps to build up more impact when our sound is triggered. Operator A is the modulator that really brings the audible low end presence and makes this synth purr. This is a fine example of just how flexible FM Synthesis is. If you were to begin adding to or taking away from any of the routing assignments below, you could end up with a very different instrument in the end.
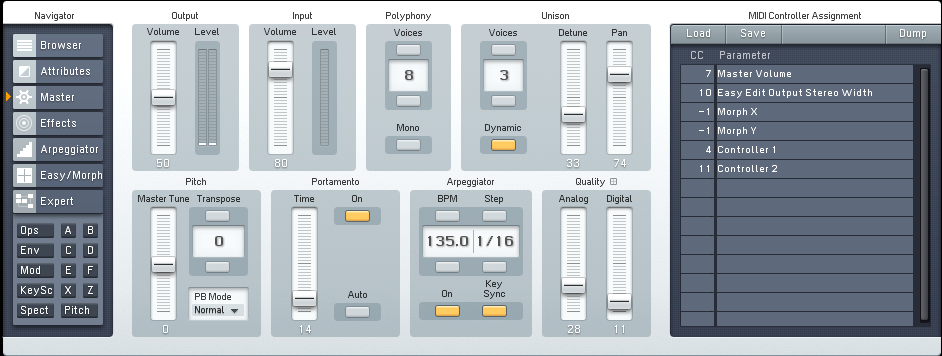
The total number of Unison Voices is increased to three on the Master window. The voices are then spread out via the Detune and Pan features. Some additional character is imparted via the Analog and Digital Qualtity parameters. And a touch of Glide is added via the Portamento tool.
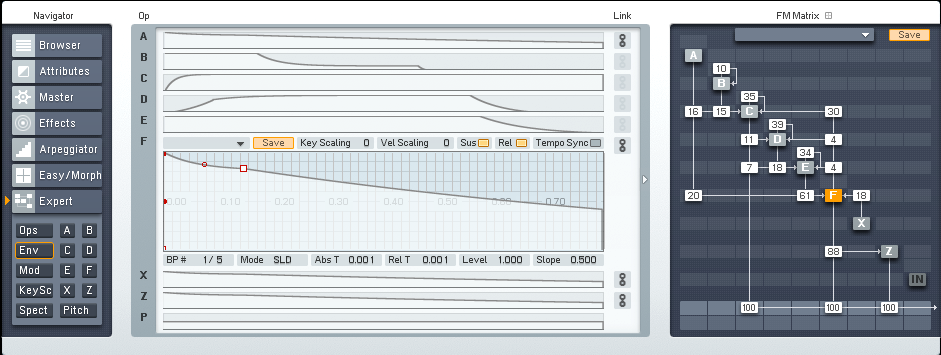
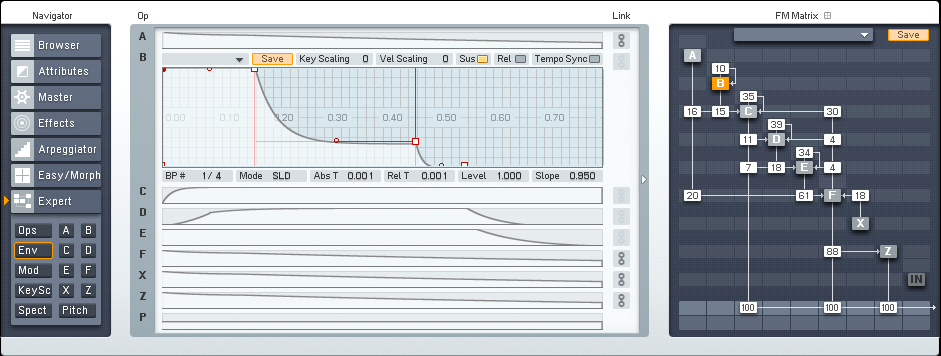
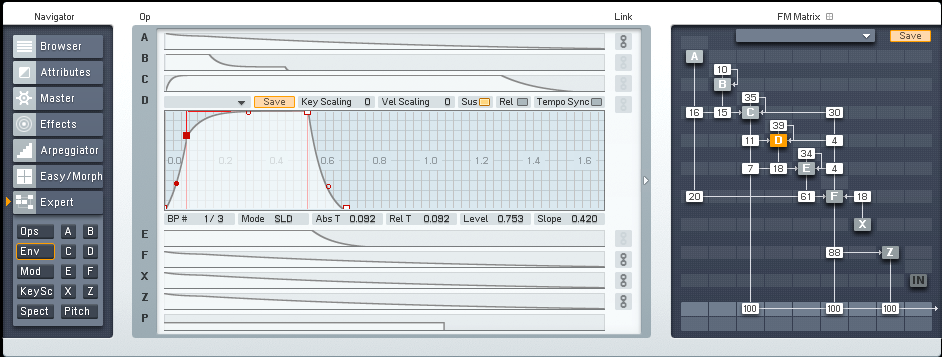
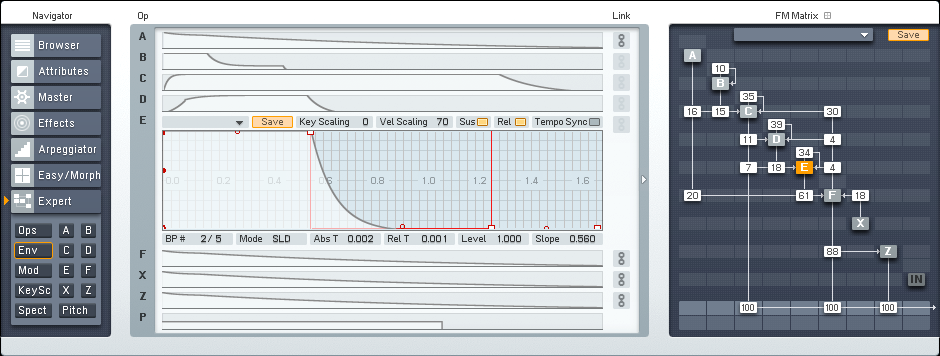
Below are each of the Operator Envelopes settings so you can see how the different elements combine to create this sound. When designing sounds with FM Synthesis it is particularly important to pay close attention to the small details, like envelope curves. Operators A, F, X and Z all have the same curve, while the remaining operators all have their own unique shape.
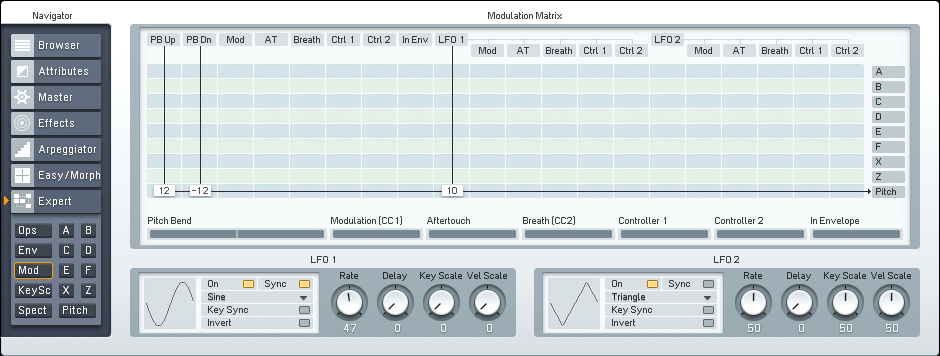
A touch of Vibrato is imparted upon the sound by assigning an LFO to modulate the Pitch value of the synth.
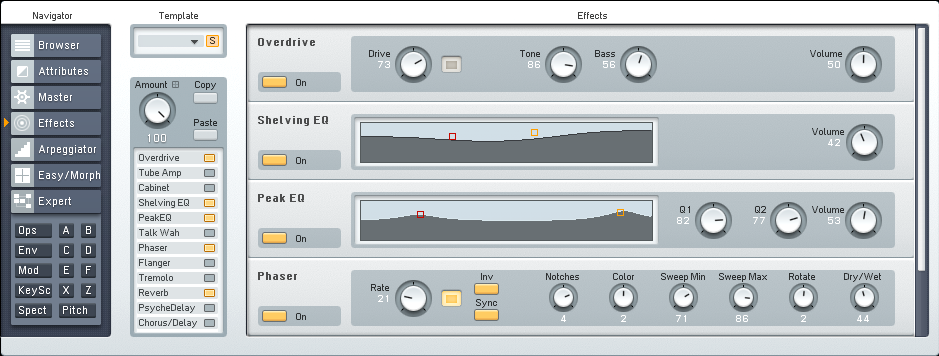
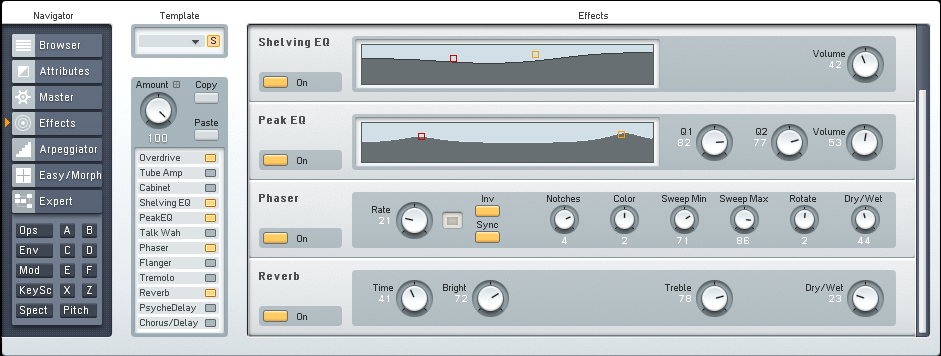
The effects that FM8 has are perhaps not the best you can find for normal everyday production needs, but they do work incredibly well within the FM Synthesis sound design workflow. In this case, some Overdrive was used to add some extra punch and drive, while the Shelving and Peak EQ units finish shaping the sound. A subtle Phaser is used to provide soem gentle movement as the sound develops and some Reverb give it a little bit of room to move around in.
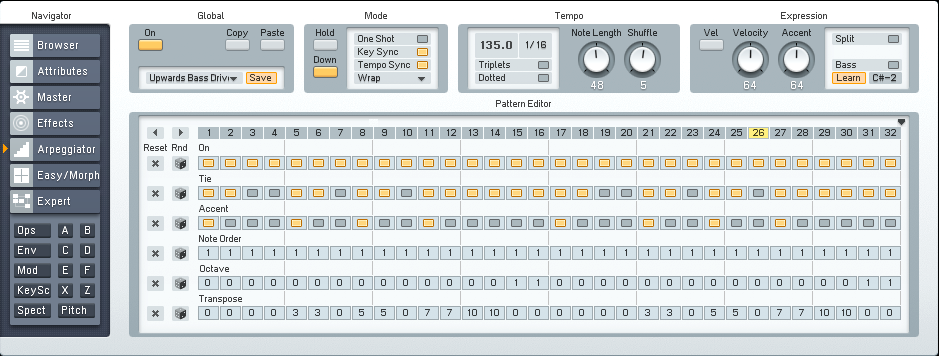
The last step was to set this synth into action with the Arpeggiator. I just used a preset for this example.
Here is a small audio sample of this synth in action. No processing of any kind has been applied outside of what has been shown in this lesson.
[audio:https://www.fm8tutorials.com/wp-content/uploads/2013/06/Driving-Analog-Synth.mp3|titles=Driving Analog Synth]Cheers,
OhmLab
Have A Question Or Comment About This Tutorial?
Want to ask a question about this tutorial or perhaps you have something to add ?
Click through to our forum post about this tutorial and join the conversation!
 YOUTUBE